> ## Documentation Index
> Fetch the complete documentation index at: https://docs.neynar.com/llms.txt
> Use this file to discover all available pages before exploring further.
# Cast Action with Analytics
> In this guide, we’ll make a cast action with the neynar SDK and frog.fm, within a few minutes! The cast action will fetch the follower count of the cast's author using its fid and display it.
## Cast Action
We'll also validate the requests using Neynar's frame validator which provides analytics as well!
Before we begin, you can access the [complete source code](https://github.com/neynarxyz/farcaster-examples/tree/main/cast-action) for this guide on GitHub.
Let's get started!
### Creating a new frames project
We will use [bun](https://bun.sh/) and [frog](https://frog.fm/) for building the cast action in this guide, but feel free to use [framejs](https://framesjs.org/), [onchainkit](https://onchainkit.xyz/), or anything else as well!
Enter this command in your terminal to create a new app:
```powershell PowerShell theme={"system"}
bunx create-frog -t bun
```
Enter a name for your project and it will spin up a new project for you. Once the project is created install the dependencies:
```powershell PowerShell theme={"system"}
cd
bun install
```
Now, let's install the dependencies that we are going to need to build out this action:
```powershell PowerShell theme={"system"}
bun add @neynar/nodejs-sdk dotenv
```
#### Creating the cast action route
Head over to the `src/index.ts` file. Here, you'll be able to see a starter frame on the / route. But first, let's change the Frog configuration to use `/api` as the base path and use neynar for hubs like this:
```typescript index.tsx theme={"system"}
export const app = new Frog({
hub: neynar({ apiKey: "NEYNAR_FROG_FM" }),
basePath: "/api",
});
```
You also might need to import neynar from "frog/hubs":
```typescript index.tsx theme={"system"}
import { neynar } from "frog/hubs";
```
Now, we'll create a new post route which will handle our cast actions. So, create a new route like this:
```typescript index.tsx theme={"system"}
app.hono.post("/followers", async (c) => {
try {
let message = "GM";
return c.json({ message });
} catch (error) {
console.error(error);
}
});
```
This route will return a GM message every time the action is clicked, but let's now use the neynar SDK to get the follower count of the cast's author!
Create a new `src/lib/neynarClient.ts` file and add the following:
```typescript neynarClient.ts theme={"system"}
import { NeynarAPIClient, Configuration } from "@neynar/nodejs-sdk";
import { config } from "dotenv";
config();
if (!process.env.NEYNAR_API_KEY) {
throw new Error("Make sure you set NEYNAR_API_KEY in your .env file");
}
// make sure to set your NEYNAR_API_KEY .env
// don't have an API key yet? get one at neynar.com
const configuration = new Configuration({
apiKey: process.env.NEYNAR_API_KEY,
});
const neynarClient = new NeynarAPIClient(configuration);
export default neynarClient;
```
Here, we initialise the neynarClient with the neynar api key which you can get from your dashboard:
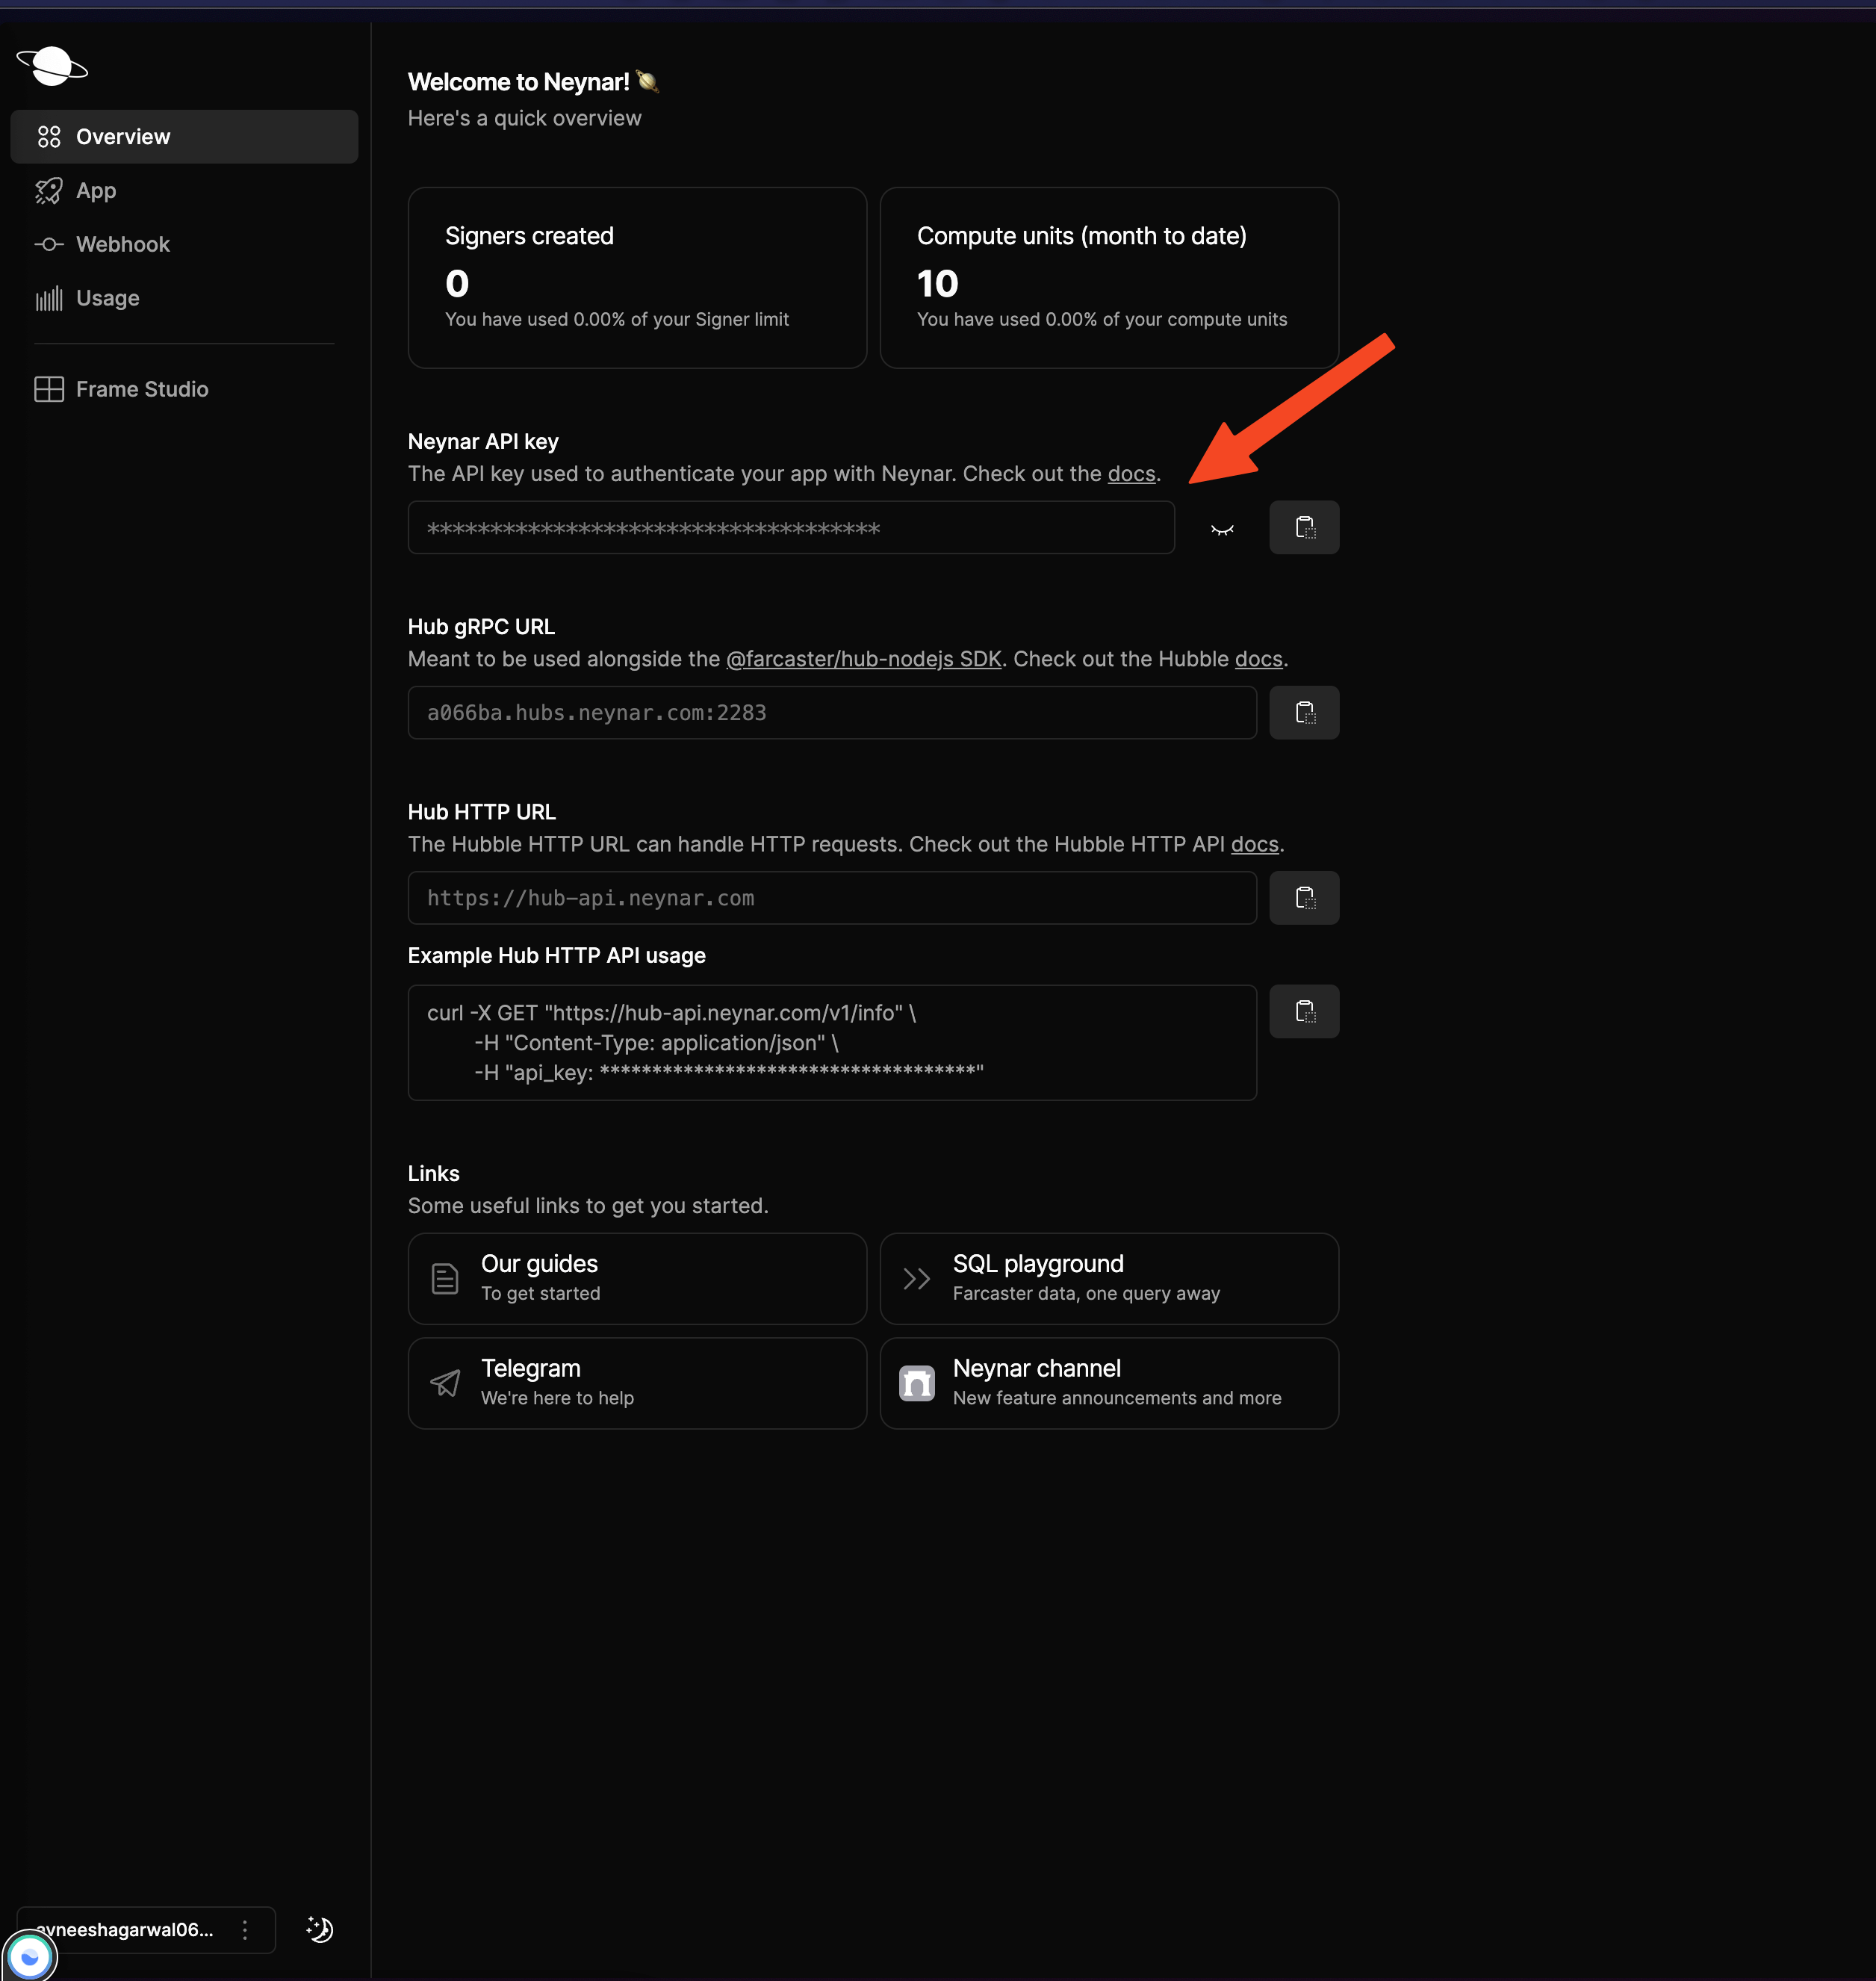 Add the api key in a `.env` file with the name `NEYNAR_API_KEY`.
Head back to the `src/index.tsx` file and add the following in the followers route instead of the GM message:
```typescript index.tsx theme={"system"}
try {
const body = await c.req.json();
const result = await neynarClient.validateFrameAction({
messageBytesInHex:body.trustedData.messageBytes}
);
const { users } = await neynarClient.fetchBulkUsers({
fids: [Number(result.action.cast.author.fid)],
});
if (!users) {
return c.json({ message: "Error. Try Again." }, 500);
}
let message = `Count:${users[0].follower_count}`;
return c.json({ message });
} catch (e) {
return c.json({ message: "Error. Try Again." }, 500);
}
```
Here, we use the neynar client that we just initialised to first validate the action and get the data from the message bytes. Then, we use it to fetch the user information using the `fetchBulkUsers` function. Finally, we return a message with the follower count!
#### Creating a frame with add cast action button
I am also adding a simple frame that allows anyone to install the action. But for that, you need to host your server somewhere, for local development you can use ngrok.
If you don’t already have it installed, install it from [here](https://ngrok.com/downloads/mac-os). Once it’s installed, authenticate using your auth token and serve your app using this command:
```powershell PowerShell theme={"system"}
ngrok http http://localhost:5173/
```
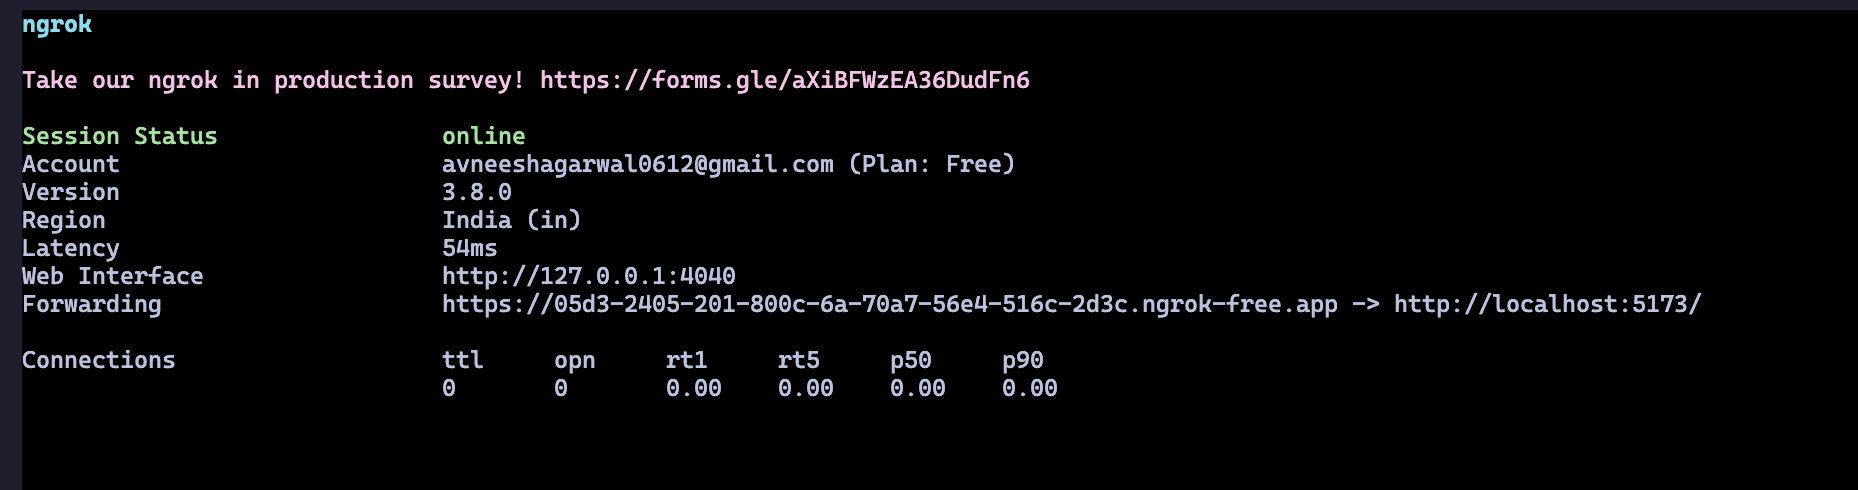
This command will give you a URL which will forward the requests to your localhost:
Add the api key in a `.env` file with the name `NEYNAR_API_KEY`.
Head back to the `src/index.tsx` file and add the following in the followers route instead of the GM message:
```typescript index.tsx theme={"system"}
try {
const body = await c.req.json();
const result = await neynarClient.validateFrameAction({
messageBytesInHex:body.trustedData.messageBytes}
);
const { users } = await neynarClient.fetchBulkUsers({
fids: [Number(result.action.cast.author.fid)],
});
if (!users) {
return c.json({ message: "Error. Try Again." }, 500);
}
let message = `Count:${users[0].follower_count}`;
return c.json({ message });
} catch (e) {
return c.json({ message: "Error. Try Again." }, 500);
}
```
Here, we use the neynar client that we just initialised to first validate the action and get the data from the message bytes. Then, we use it to fetch the user information using the `fetchBulkUsers` function. Finally, we return a message with the follower count!
#### Creating a frame with add cast action button
I am also adding a simple frame that allows anyone to install the action. But for that, you need to host your server somewhere, for local development you can use ngrok.
If you don’t already have it installed, install it from [here](https://ngrok.com/downloads/mac-os). Once it’s installed, authenticate using your auth token and serve your app using this command:
```powershell PowerShell theme={"system"}
ngrok http http://localhost:5173/
```
This command will give you a URL which will forward the requests to your localhost:
 You can now head over to the [cast action playground](https://warpcast.com/~/developers/cast-actions) and generate a new URL by adding in the info as such:
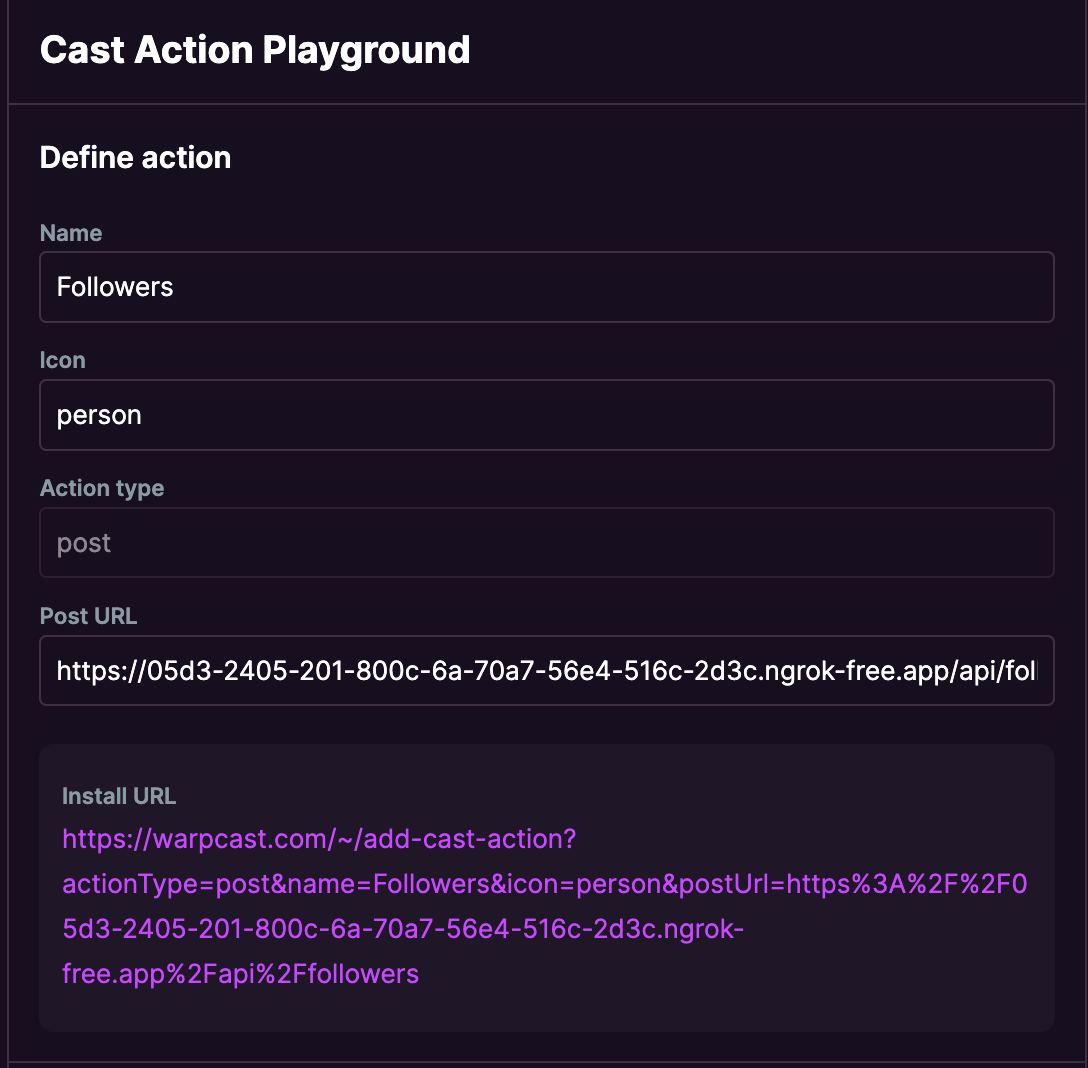 Copy the install URL and paste it into a new variable in the `index.tsx` like this:
```typescript index.tsx theme={"system"}
const ADD_URL =
"https://warpcast.com/~/add-cast-action?actionType=post&name=Followers&icon=person&postUrl=https%3A%2F%2F05d3-2405-201-800c-6a-70a7-56e4-516c-2d3c.ngrok-free.app%2Fapi%2Ffollowers";
```
Finally, you can replace the / route with the following to have a simple frame which links to this URL:
```typescript index.tsx theme={"system"}
app.frame("/", (c) => {
return c.res({
image: (
Copy the install URL and paste it into a new variable in the `index.tsx` like this:
```typescript index.tsx theme={"system"}
const ADD_URL =
"https://warpcast.com/~/add-cast-action?actionType=post&name=Followers&icon=person&postUrl=https%3A%2F%2F05d3-2405-201-800c-6a-70a7-56e4-516c-2d3c.ngrok-free.app%2Fapi%2Ffollowers";
```
Finally, you can replace the / route with the following to have a simple frame which links to this URL:
```typescript index.tsx theme={"system"}
app.frame("/", (c) => {
return c.res({
image: (
gm! Add cast action to view followers count
),
intents: [Add Action],
});
});
```
If you now start your server using `bun run dev` and head over to [http://localhost:5173/dev](http://localhost:5173/dev) you'll be able to see a frame somewhat like this:
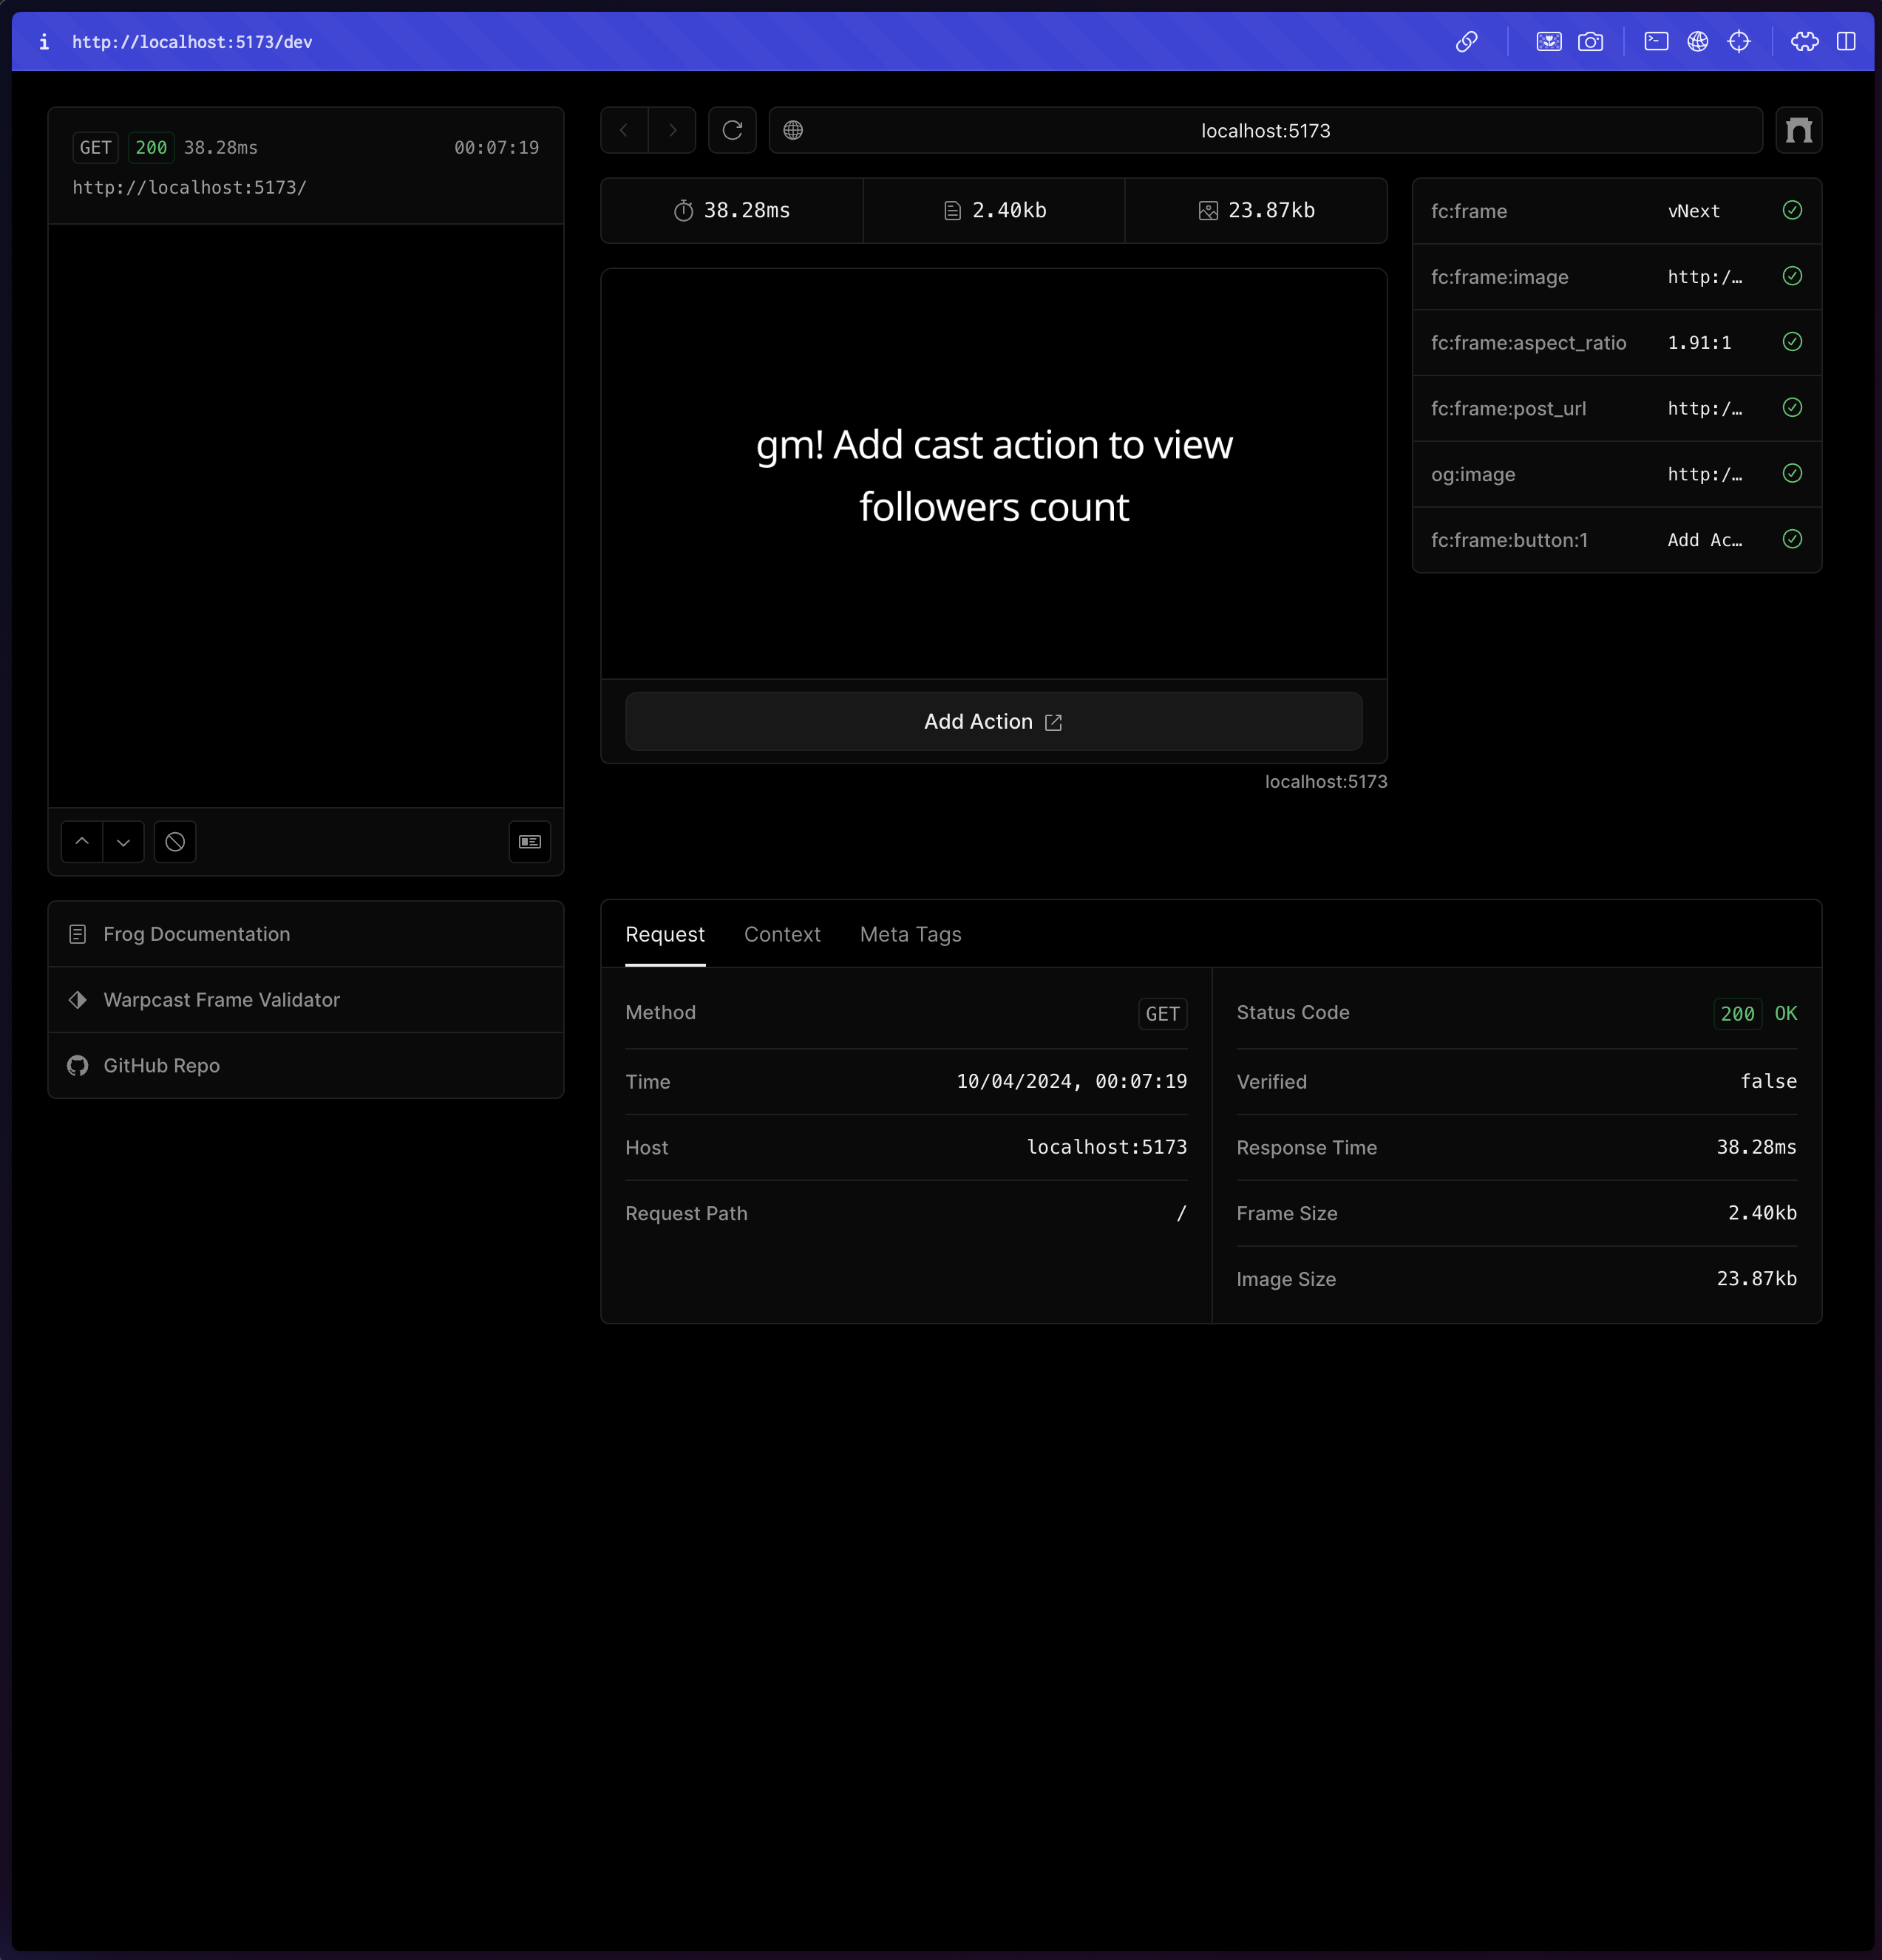 Click on Add action and it'll prompt you to add a new action like this:
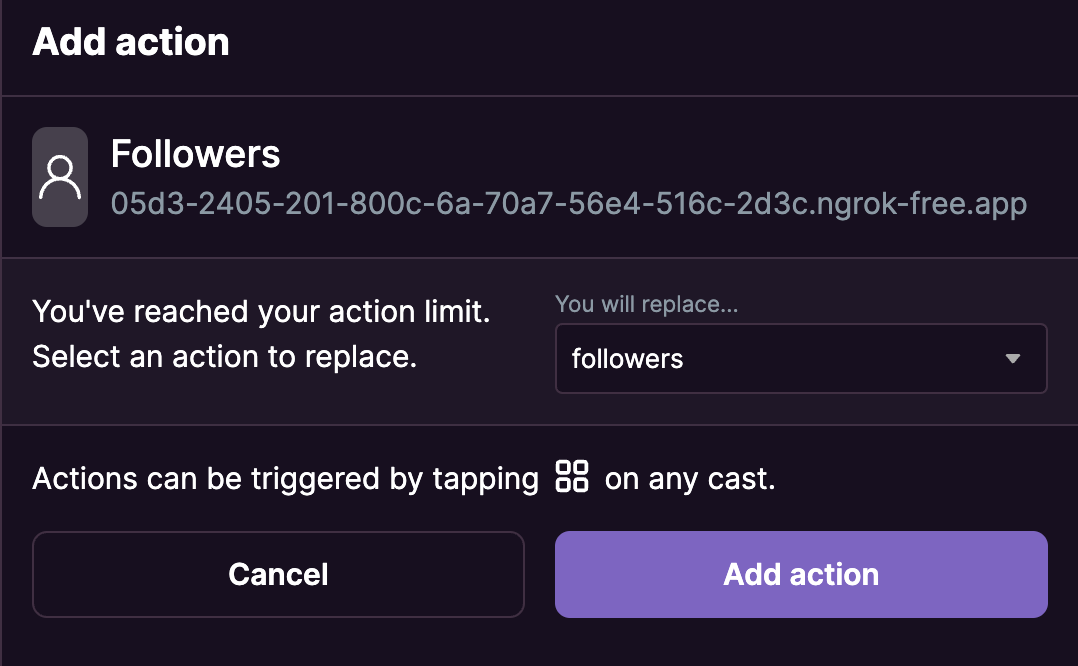 Once you have added the action, you can start using it on Warpcast to see the follower count of various people! 🥳
### Analytics
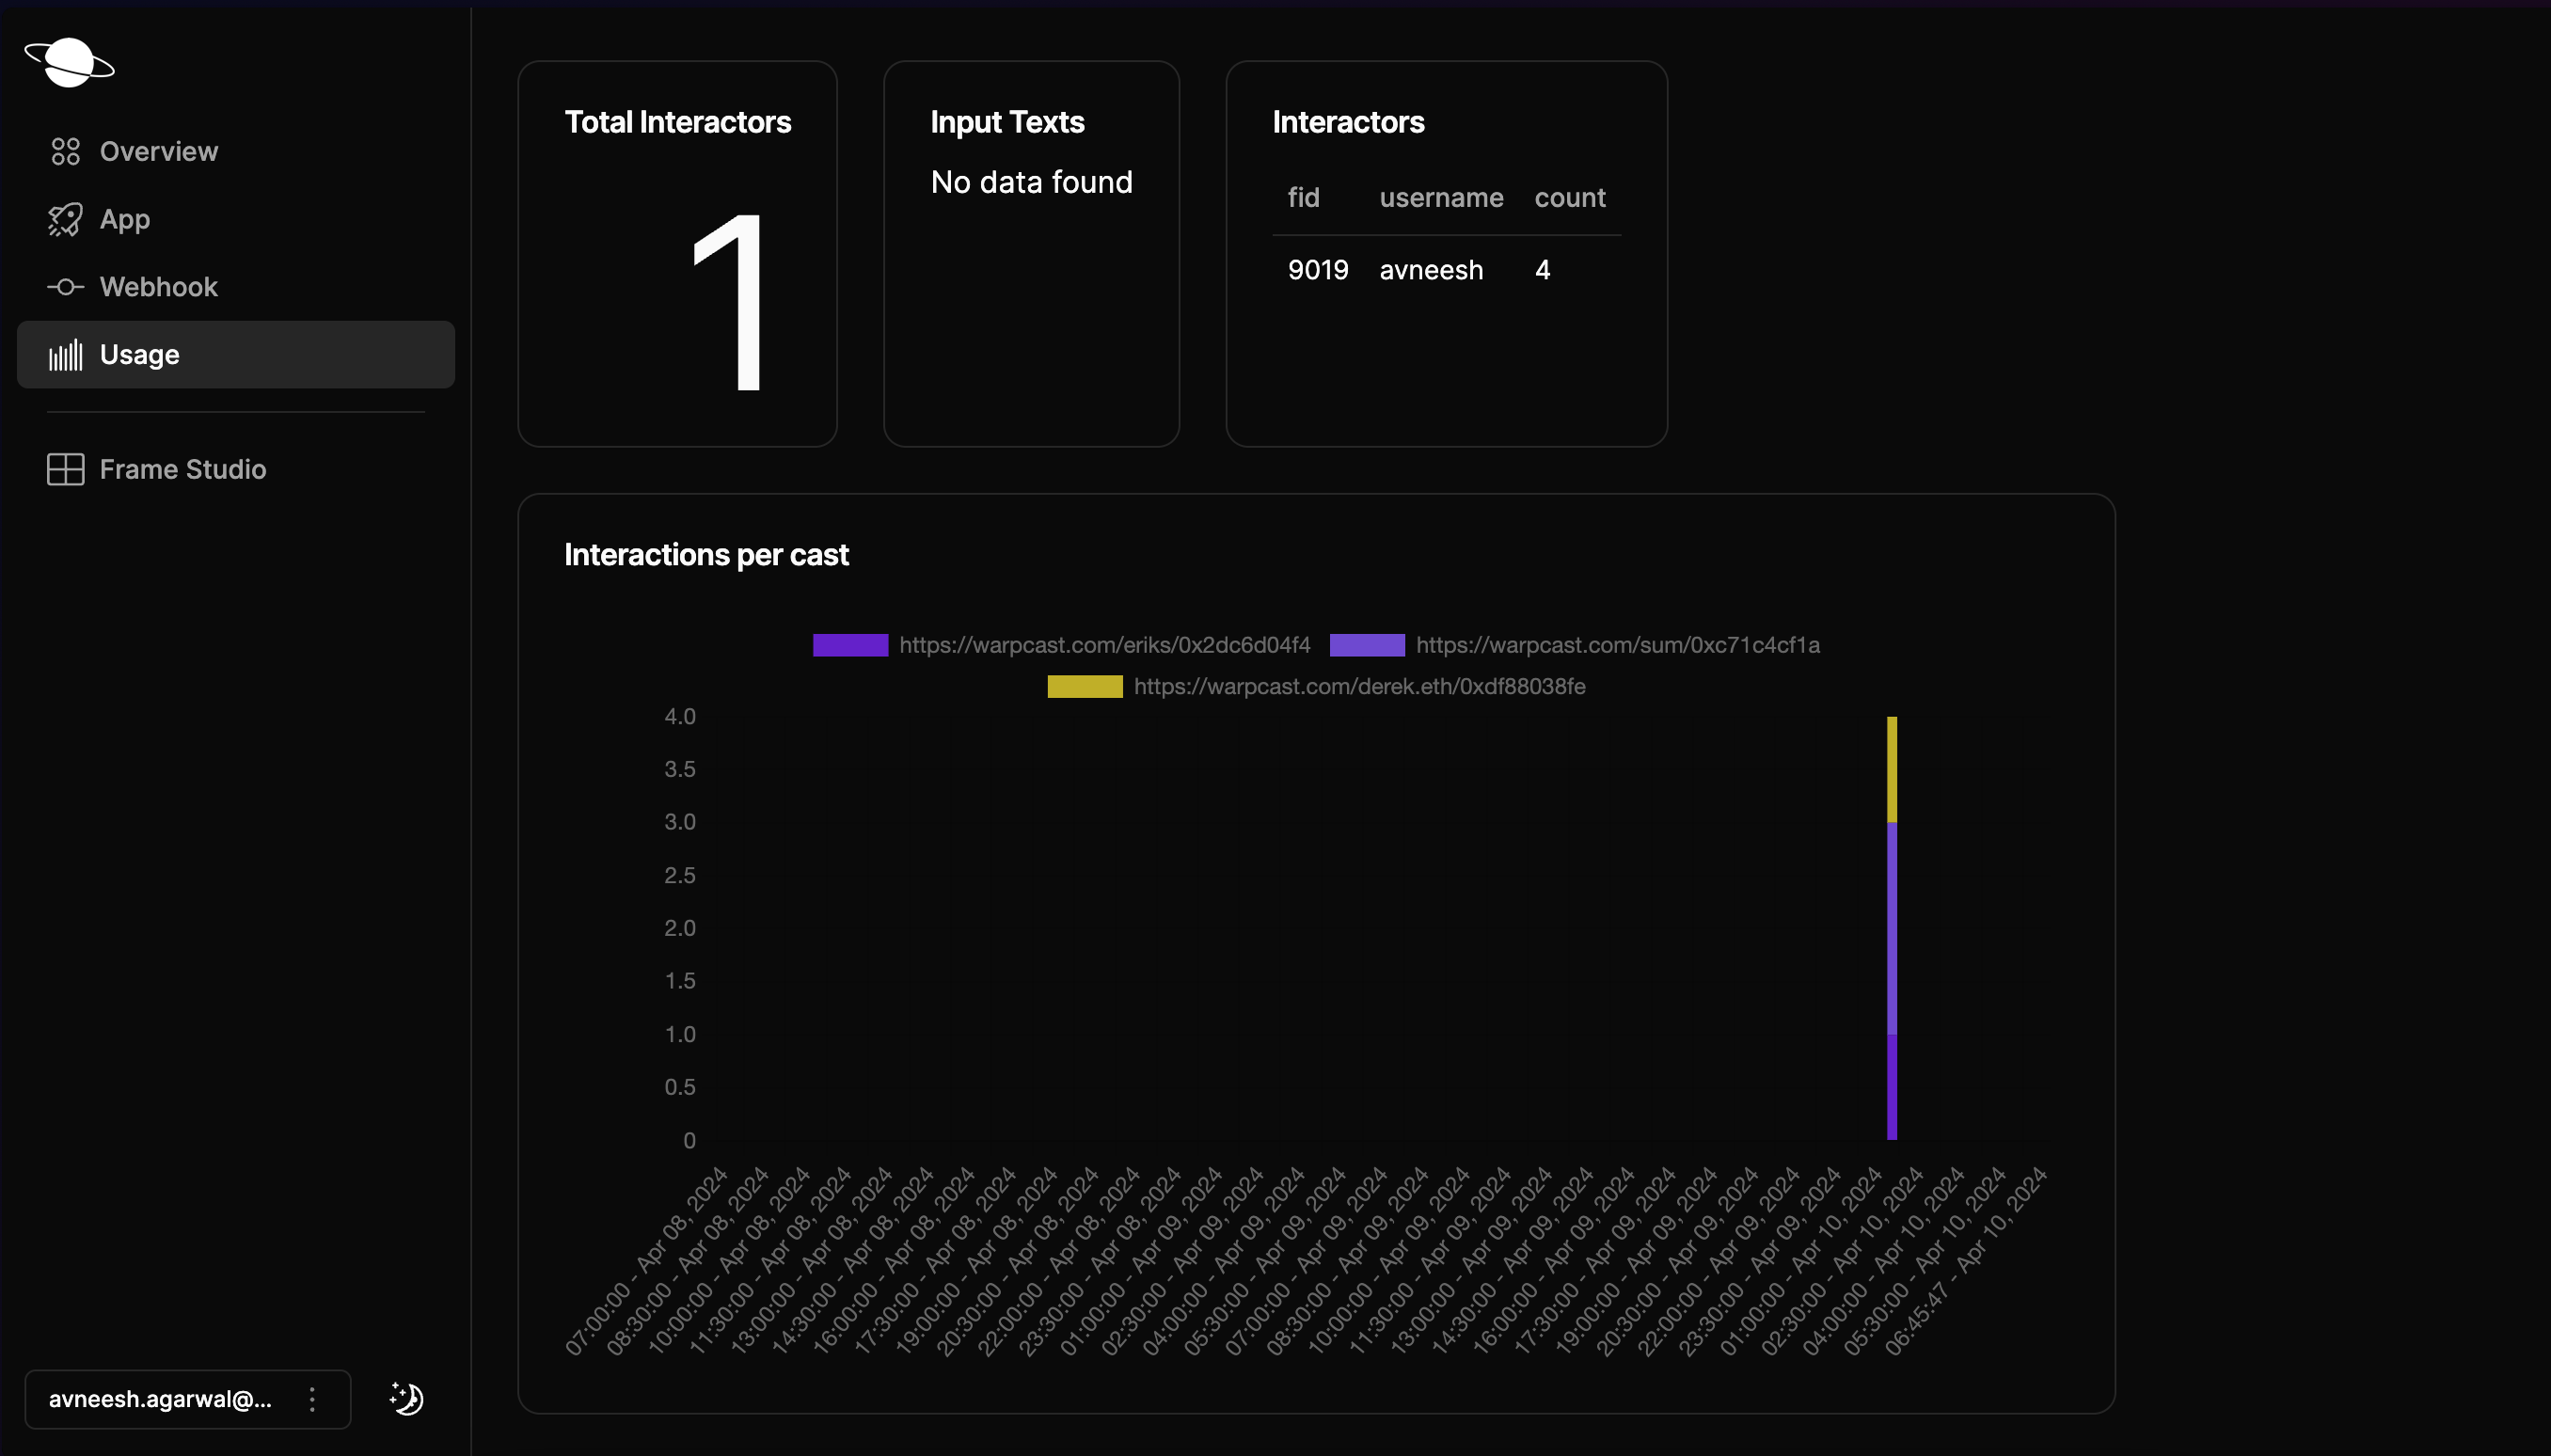
Since we are using the validateFrameAction function, we also get analytics out of the box. Head over to the usage tab and click on the frame that you are currently using. It will provide you with various analytics like total interactors, interactions per cast, etc.
Once you have added the action, you can start using it on Warpcast to see the follower count of various people! 🥳
### Analytics
Since we are using the validateFrameAction function, we also get analytics out of the box. Head over to the usage tab and click on the frame that you are currently using. It will provide you with various analytics like total interactors, interactions per cast, etc.
 ### Conclusion
This guide taught us how to create a Farcaster cast action that shows the follower count of the cast's author! If you want to look at the completed code, check out the [GitHub repository](https://github.com/neynarxyz/farcaster-examples/tree/main/cast-action).
Lastly, make sure to share what you built with us on Farcaster by tagging [@neynar](https://warpcast.com/neynar), and if you have any questions, reach out to us on [warpcast](https://warpcast.com/~/channel/neynar) or [Slack](https://neynar.com/slack)!
### Conclusion
This guide taught us how to create a Farcaster cast action that shows the follower count of the cast's author! If you want to look at the completed code, check out the [GitHub repository](https://github.com/neynarxyz/farcaster-examples/tree/main/cast-action).
Lastly, make sure to share what you built with us on Farcaster by tagging [@neynar](https://warpcast.com/neynar), and if you have any questions, reach out to us on [warpcast](https://warpcast.com/~/channel/neynar) or [Slack](https://neynar.com/slack)!