> ## Documentation Index
> Fetch the complete documentation index at: https://docs.neynar.com/llms.txt
> Use this file to discover all available pages before exploring further.
# Dynamic Frame Creation
> Take a look at how to create frames on the fly using our SDK
### Refers to this set of APIs: [Create frame](/reference/publish-neynar-frame)
In this guide, we’ll look at creating Farcaster frames with the neynar SDK without worrying about creating a new web app, hosting it, and all the hassle. Just write the code for your frame, call the API to publish, and you're done! This can be useful in many places, especially if you want to generate frames on the fly.
## Creating a new node app
Create a new app by entering the following commands in your terminal:
```powershell PowerShell theme={"system"}
mkdir frames-node
cd frames-node
npm init
```
We are going to need the `@neynar/nodejs-sdk`, so let’s install that as well:
```powershell PowerShell theme={"system"}
yarn add @neynar/nodejs-sdk
```
## Creating the frame
Once the project is created and the packages are installed, you can open it in your favorite editor and create a new `script.js` file and add the following:
```javascript script.js theme={"system"}
import { NeynarAPIClient, Configuration } from "@neynar/nodejs-sdk";
const main = async () => {
const config = new Configuration({
apiKey: process.env.NEYNAR_API_KEY,
});
const neynarClient = new NeynarAPIClient(config);
const creationRequest = {
name: "gm",
pages: [
{
image: {
url: "https://remote-image.decentralized-content.com/image?url=https%3A%2F%2Fipfs.decentralized-content.com%2Fipfs%2Fbafybeifjdrcl2p4kmfv2uy3i2wx2hlxxn4hft3apr37lctiqsfdixjy3qi&w=1920&q=75",
aspect_ratio: "1.91:1",
},
title: "Neynar NFT minting frame",
buttons: [
{
action_type: "mint",
title: "Mint",
index: 1,
next_page: {
mint_url:
"eip155:8453:0x23687d295fd48db3e85248b734ea9e8fb3fced27:1",
},
},
],
input: {
text: {
enabled: false,
},
},
uuid: "gm",
version: "vNext",
},
],
};
const frame = await neynarClient.publishNeynarFrame(creationRequest);
console.log(frame);
};
main();
```
Make sure to pass your API key in the NeynarAPIClient. Ideally, you should store your API keys in env variables.
This is a simple NFT minting frame here. The `publishNeynarFrame` function accepts an object with a bunch of parameters. Let's take a look at what they are:
* `name`: This will be the name of your frame, and it will be visible only to you on your [dashboard](https://neynar.com/nfs/frames)
* `pages`: This will be an array of the pages to display on the frame; the parameters here are just what you would typically pass in a frame, like image, title, buttons, input, version, etc.
* `next_page`: This is where you define what happens when you click the button. Since we are creating an NFT minting frame, it contains the `mint_url`. But you can pass in `redirect_url` to redirect to a new page or `uuid` of a new page, to change the current frame page.
* mint\_url: This is a string I created using data from a collection on [zora](https://zora.co). The string should be of the form "eip155:chainId:contractAddress:tokenID". The contract address and token ID can be found from the Zora share URL, which looks somewhat like this [https://zora.co/collect/base:0x23687d295fd48db3e85248b734ea9e8fb3fced27/1](https://zora.co/collect/base:0x23687d295fd48db3e85248b734ea9e8fb3fced27/1); you can check out the corresponding `chainId` of your chain on [ChainList](https://chainlist.org/?search=). For example, `chainId` for the base mainnet chain is 8453.
Once you have updated all your metadata and API key, run the script by using the command:
```powershell PowerShell theme={"system"}
node script.js
```
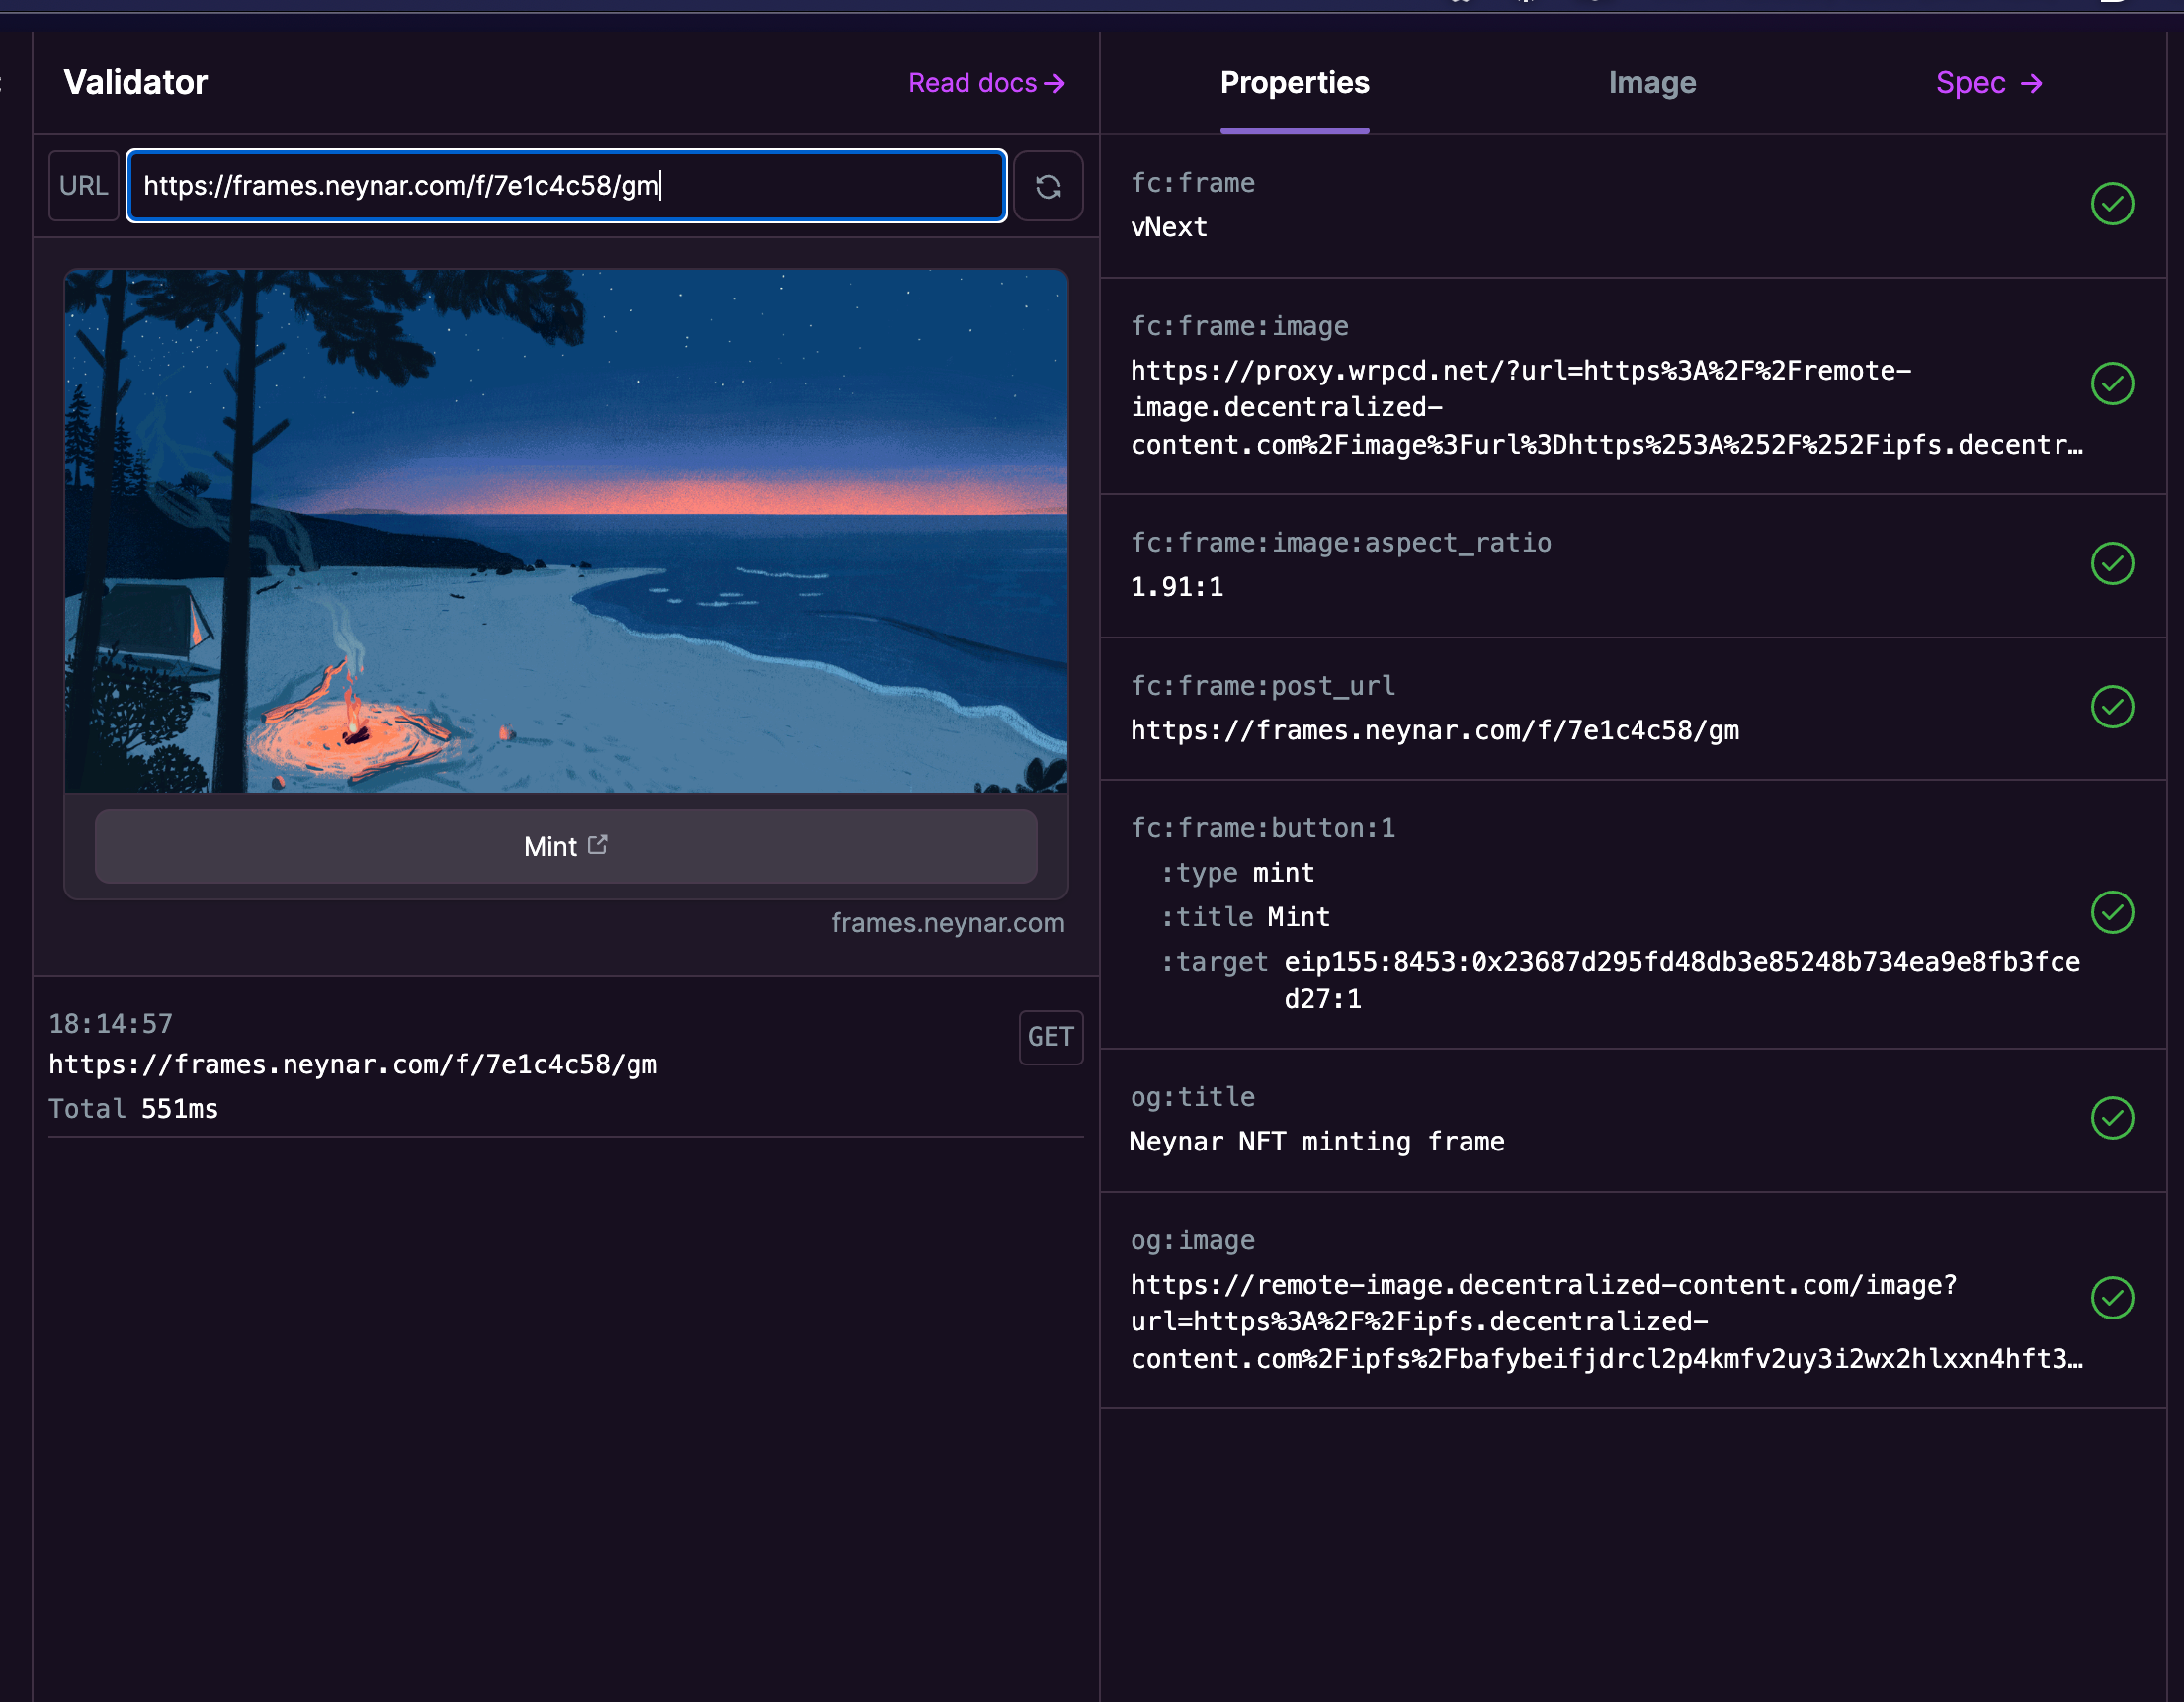
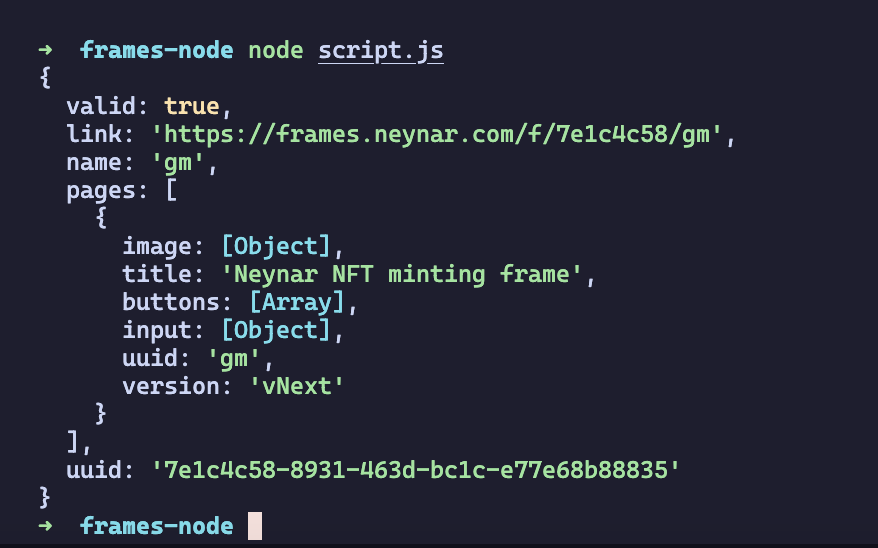 It should return an object similar to this when you run your script, copy the link from here and enter it on the [Warpcast validator](https://warpcast.com/~/developers/frames). Enter your URL and you can inspect the properties of your frame here.
### Mint button won't work in the validator, to test out the mint button you'll need to create a new cast
It should return an object similar to this when you run your script, copy the link from here and enter it on the [Warpcast validator](https://warpcast.com/~/developers/frames). Enter your URL and you can inspect the properties of your frame here.
### Mint button won't work in the validator, to test out the mint button you'll need to create a new cast
 If everything looks good, you can create your cast and share your cast with the world!
Lastly, make sure to share what you built with us on Farcaster by tagging [@neynar](https://warpcast.com/neynar), and if you have any questions, reach out to us on [warpcast](https://warpcast.com/~/channel/neynar) or [Slack](https://neynar.com/slack)!
If everything looks good, you can create your cast and share your cast with the world!
Lastly, make sure to share what you built with us on Farcaster by tagging [@neynar](https://warpcast.com/neynar), and if you have any questions, reach out to us on [warpcast](https://warpcast.com/~/channel/neynar) or [Slack](https://neynar.com/slack)!