> ## Documentation Index
> Fetch the complete documentation index at: https://docs.neynar.com/llms.txt
> Use this file to discover all available pages before exploring further.
# Programmatic Webhooks
> Neynar webhooks are a way to receive real-time updates about events on the Farcaster protocol. You can use webhooks to build integrations that respond to events on the protocol, such as when a user creates a cast or when a user updates their profile.
### Related set of APIs: [Create a webhook](/reference/publish-webhook)
You might need to create multiple webhooks tracking different activities and calling different APIs programmatically. So, let's see how we can create webhooks using the neynar SDK in a node script.
I am using a [bun app](https://bun.sh/) for the sake of simplicity of this guide, but you can use express, Next.js api routes or any server you wish to use!
Create a new server by entering the following commands in your terminal:
```powershell Powershell theme={"system"}
mkdir webhooks-sdk
cd webhooks-sdk
bun init
```
We are going to need the `@neynar/nodejs-sdk`, so let’s install that as well:
```powershell Powershell theme={"system"}
bun add @neynar/nodejs-sdk
```
Once the project is created and the packages are installed, you can open it in your favourite editor and add the following in a new `script.ts` file:
```typescript script.ts theme={"system"}
import { NeynarAPIClient,Configuration } from "@neynar/nodejs-sdk";
// make sure to set your NEYNAR_API_KEY .env
// don't have an API key yet? get one at neynar.com
const config = new Configuration({
apiKey:process.env.NEYNAR_API_KEY,
});
if (!process.env.NEYNAR_API_KEY) {
throw new Error("NEYNAR_API_KEY is not set");
}
const client = new NeynarAPIClient(config);
const webhook = await client.publishWebhook({
name:"abc",
url:"YOUR_NGROK_URL_HERE",
subscription: {
"cast.created": {
text: "\\$(DEGEN|degen)",
},
},
}
);
console.log(webhook);
```
This simple script uses the neynarClient to publish a webhook with a name, url and subscription parameter. The webhook will call the target URL every time the subscribed event occurs. Here, I've chosen all the casts created with degen present in the text. You can select the regex or type of subscription according to your use. You can also subscribe to multiple events here at once! You can take a look at all the possible ways in [Publish Webhook API](/reference/publish-webhook).
You can get the neynar api key that we are using to initialise the client from the neynar dashboard.
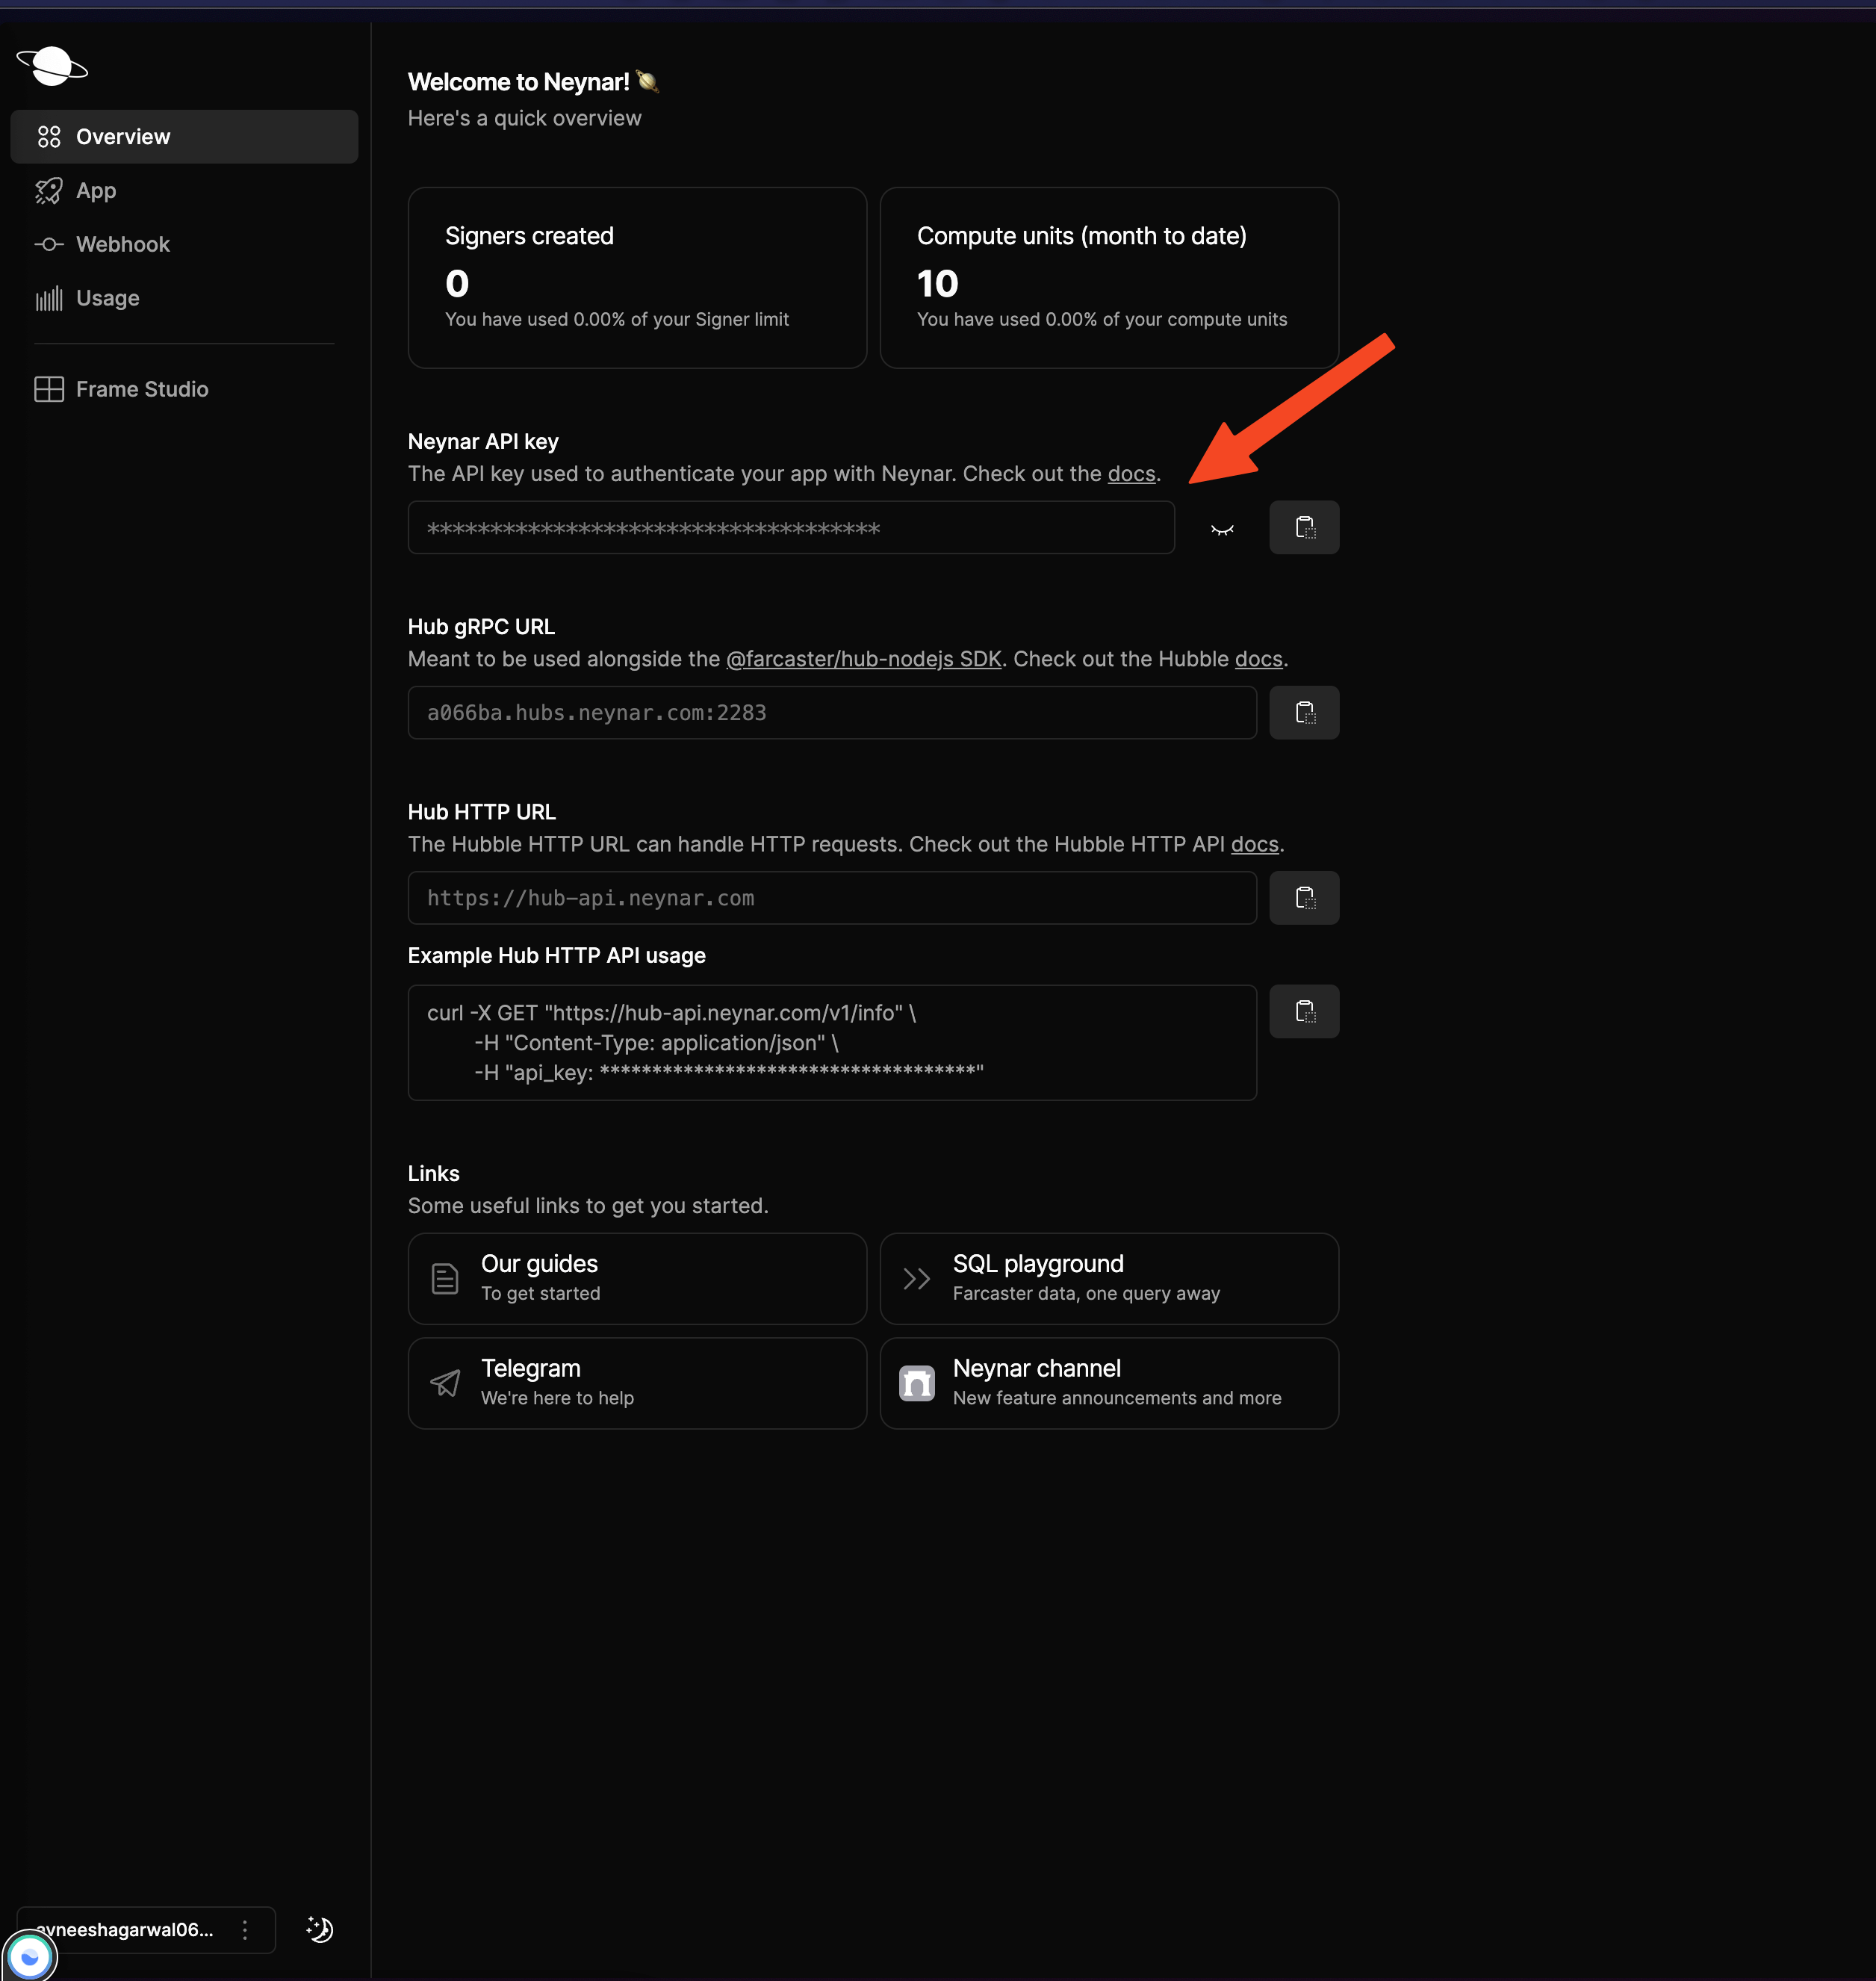 Add the api key in a `.env` file with the name `NEYNAR_API_KEY`.
Now, let's test our api but to do that we'll need an api which we can call. In the `index.ts` file add the following:
```typescript index.ts theme={"system"}
const server = Bun.serve({
port: 3000,
async fetch(req) {
try {
console.log(await req.json());
return new Response("gm!");
} catch (e: any) {
return new Response(e.message, { status: 500 });
}
},
});
console.log(`Listening on localhost:${server.port}`);
```
This will spin up a server on localhost:3000 and log the request body every time the API gets called. Let's run it in one terminal using `bun run index.ts` and we'll use ngrok to serve it. If you don’t already have it installed, install it from [here](https://ngrok.com/downloads/mac-os). Once it’s installed, authenticate using your auth token and serve your app using this command:
```powershell Powershell theme={"system"}
ngrok http http://localhost:3000
```
### Free endpoints like ngrok, localtunnel, etc. can have issues because service providers start blocking events over a certain limit
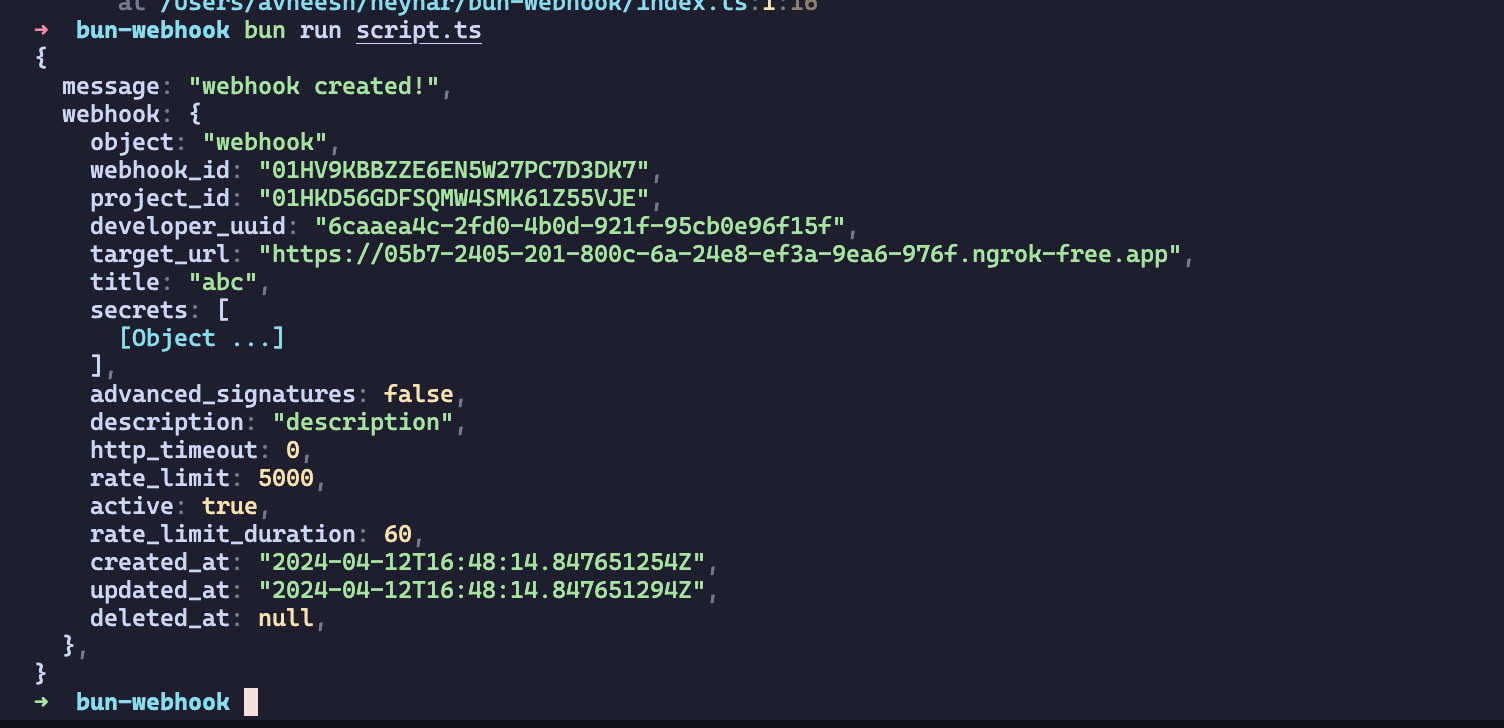
Copy the URL you got from ngrok and replace it with `YOUR_NGROK_URL_HERE` in the previous script. Once you've done that, run the script using `bun run script.ts` and it should create a webhook for you like this:
Add the api key in a `.env` file with the name `NEYNAR_API_KEY`.
Now, let's test our api but to do that we'll need an api which we can call. In the `index.ts` file add the following:
```typescript index.ts theme={"system"}
const server = Bun.serve({
port: 3000,
async fetch(req) {
try {
console.log(await req.json());
return new Response("gm!");
} catch (e: any) {
return new Response(e.message, { status: 500 });
}
},
});
console.log(`Listening on localhost:${server.port}`);
```
This will spin up a server on localhost:3000 and log the request body every time the API gets called. Let's run it in one terminal using `bun run index.ts` and we'll use ngrok to serve it. If you don’t already have it installed, install it from [here](https://ngrok.com/downloads/mac-os). Once it’s installed, authenticate using your auth token and serve your app using this command:
```powershell Powershell theme={"system"}
ngrok http http://localhost:3000
```
### Free endpoints like ngrok, localtunnel, etc. can have issues because service providers start blocking events over a certain limit
Copy the URL you got from ngrok and replace it with `YOUR_NGROK_URL_HERE` in the previous script. Once you've done that, run the script using `bun run script.ts` and it should create a webhook for you like this:
 Once the webhook is created, you'll start seeing logs on your server, which means that our webhook is working successfully!
## Conclusion
Lastly, make sure to share what you built with us on Farcaster by tagging [@neynar](https://warpcast.com/neynar), and if you have any questions, reach out to us on [warpcast](https://warpcast.com/~/channel/neynar) or [Slack](https://neynar.com/slack)!
Once the webhook is created, you'll start seeing logs on your server, which means that our webhook is working successfully!
## Conclusion
Lastly, make sure to share what you built with us on Farcaster by tagging [@neynar](https://warpcast.com/neynar), and if you have any questions, reach out to us on [warpcast](https://warpcast.com/~/channel/neynar) or [Slack](https://neynar.com/slack)!