> ## Documentation Index
> Fetch the complete documentation index at: https://docs.neynar.com/llms.txt
> Use this file to discover all available pages before exploring further.

# How writes to Farcaster work with Neynar managed signers

> (incl. frontend)

In this guide, we’ll take a look at how to integrate neynar managed signers with neynar in a next.js app *so your users can take actions on the Farcaster protocol.*

Managed signers allow you to take full control of the connection, including the branding on Warpcast and everything else!

<Info>
  ### If using login providers like Privy, it's best to use this signer product. Users won't see a double login and developers will get full write functionality to Farcaster.
</Info>

## Context

This guide covers setting up a full app with frontend and backend to start writing with a logged in user. You can pick and choose the right pieces from this guide as needed. We'll go over:

1. Creating a signer key for the user so they can sign in
2. Storing the user's credentials in local storage
3. Writing casts to Farcaster using the signer

Before we begin, you can access the [complete source code](https://github.com/neynarxyz/farcaster-examples/tree/main/managed-signers) for this guide on GitHub.

The simplest way to set up managed signers is by cloning the above repo! You can use the following commands to check it out:

```bash theme={"system"}
npx degit https://github.com/neynarxyz/farcaster-examples/tree/main/managed-signers managed-signers
cd managed-signers
yarn
yarn dev
```

### The ideal user flow

**Terminology**

To understand the ideal user flow, let's quickly go over some terminology:

* Authentication: This is where an account proves they are who they say they are. Flows like Sign in with Farcaster (SIWF) or login providers like Privy allow this for app logins.
* Authorization: this is where an account gives the app certain access privileges to take actions on behalf of the account. This is what Neynar signers allow for writing data to the protocol.

Authorization requires authentication so that once a user is authenticated, they can then *authorize* an action. E.g. authenticating into your Google account to then authorize a 3rd party app like Slack to access your Google Calendar. If starting logged out, the full flow takes two distinct steps.

**User journey**

You can build a user flow using tools like:

* [SIWN: Connect Farcaster accounts](/docs/how-to-let-users-connect-farcaster-accounts-with-write-access-for-free-using-sign-in-with-neynar-siwn)
* or 3rd party login providers like Privy

If using Privy

* the 1st step on authentication happens on Privy login and the 2nd step of authorization happens on Neynar
* The second step requires the user to scan a QR code or tap on a link to then generate a signer on a Farcaster client like Warpcast
* Generating a signer requires paying onchain fees. Neynar [sponsors signers](/docs/two-ways-to-sponsor-a-farcaster-signer-via-neynar) by default so users pay \$0.

**Let's go!**

Now that we have context, let's get started!

## Setting up a next.js app

### Creating a next app

We are going to need a frontend as well as a backend server, so we are going to use Next.js for this guide. Run the following command to create a new next.js app:

<CodeGroup>
  ```powershell PowerShell theme={"system"}
  npx create-next-app managed-signers
  ```
</CodeGroup>

Choose the configuration for your app and wait for the dependencies to install. Once they are installed, let's install the additional packages that we are going to need:

<CodeGroup>
  ```powershell npm theme={"system"}
  npm i @farcaster/hub-nodejs @neynar/nodejs-sdk axios qrcode.react viem
  ```

  ```powershell yarn theme={"system"}
  yarn add @farcaster/hub-nodejs @neynar/nodejs-sdk axios qrcode.react viem
  ```

  ```powershell pnpm theme={"system"}
  pnpm add @farcaster/hub-nodejs @neynar/nodejs-sdk axios qrcode.react viem
  ```

  ```powershell bun theme={"system"}
  bun add @farcaster/hub-nodejs @neynar/nodejs-sdk axios qrcode.react viem
  ```
</CodeGroup>

Now, you can open the folder in your favourite code editor and we can start building!

### Configuring env variables

Firstly, let's configure the env variables we will need. Create a new `.env.local` file and add these two variables:

```bash theme={"system"}
NEYNAR_API_KEY=
FARCASTER_DEVELOPER_MNEMONIC=
```

* The neynar api key should be the api key that you can view on your dashboard
* the mnemonic should be the mnemonic associated with the developer account which will be used to create the signers e.g. `@your_company_name` account on Farcaster (to state the obvious out loud, you *won't* need user mnemonics at any point)

## Creating API route for generating the signature

Create a new `route.ts` file in the `src/app/api/signer` folder and add the following:

<CodeGroup>
  ```typescript route.ts theme={"system"}
  import { getSignedKey } from "@/utils/getSignedKey";
  import { NextResponse } from "next/server";

  export async function POST() {
    try {
      const signedKey = await getSignedKey();

      return NextResponse.json(signedKey, {
        status: 200,
      });
    } catch (error) {
      return NextResponse.json({ error: "An error occurred" }, { status: 500 });
    }
  }
  ```
</CodeGroup>

This is just defining a get and a post request and calling a getSignedKey function but we haven't created that yet, so let's do that.

Create a new `utils/getSignedKey.ts`file and add the following:

<CodeGroup>
  ```typescript getSignedKey.ts theme={"system"}
  import neynarClient from "@/lib/neynarClient";
  import { ViemLocalEip712Signer } from "@farcaster/hub-nodejs";
  import { bytesToHex, hexToBytes } from "viem";
  import { mnemonicToAccount } from "viem/accounts";
  import { getFid } from "./getFid";

  export const getSignedKey = async () => {
    const createSigner = await neynarClient.createSigner();
    const { deadline, signature } = await generate_signature(
      createSigner.public_key
    );

    if (deadline === 0 || signature === "") {
      throw new Error("Failed to generate signature");
    }

    const fid = await getFid();

    const signedKey = await neynarClient.registerSignedKey({
      signerUuid:createSigner.signer_uuid,
      appFid:fid,
      deadline,
      signature
    });


    return signedKey;
  };

  const generate_signature = async function (public_key: string) {
    if (typeof process.env.FARCASTER_DEVELOPER_MNEMONIC === "undefined") {
      throw new Error("FARCASTER_DEVELOPER_MNEMONIC is not defined");
    }

    const FARCASTER_DEVELOPER_MNEMONIC = process.env.FARCASTER_DEVELOPER_MNEMONIC;
    const FID = await getFid();

    const account = mnemonicToAccount(FARCASTER_DEVELOPER_MNEMONIC);
    const appAccountKey = new ViemLocalEip712Signer(account as any);

    // Generates an expiration date for the signature (24 hours from now).
    const deadline = Math.floor(Date.now() / 1000) + 86400;

    const uintAddress = hexToBytes(public_key as `0x${string}`);

    const signature = await appAccountKey.signKeyRequest({
      requestFid: BigInt(FID),
      key: uintAddress,
      deadline: BigInt(deadline),
    });

    if (signature.isErr()) {
      return {
        deadline,
        signature: "",
      };
    }

    const sigHex = bytesToHex(signature.value);

    return { deadline, signature: sigHex };
  };
  ```
</CodeGroup>

We are doing a couple of things here, so let's break it down.

We first use the neynarClient (yet to create) to create a signer, and then we use the `appAccountKey.signKeyRequest` function from the `@farcaster/hub-nodejs` package to create a sign key request. Finally, we use the `registerSignedKey` function from the neynarClient to return the signedKey.

Let's now initialise our `neynarClient` in a new `lib/neynarClient.ts` file like this:

<CodeGroup>
  ```typescript neynarClient.ts theme={"system"}
  import { Configuration, NeynarAPIClient } from "@neynar/nodejs-sdk";

  if (!process.env.NEYNAR_API_KEY) {
    throw new Error("Make sure you set NEYNAR_API_KEY in your .env file");
  }

  const config = new Configuration({
    apiKey: process.env.NEYNAR_API_KEY,
  });

  const neynarClient = new NeynarAPIClient(config);

  export default neynarClient;
  ```
</CodeGroup>

We are also using another util function named `getFid` in the signature generation, so let's create a `utils/getFid.ts` file and create that as well:

<CodeGroup>
  ```typescript getFid.ts theme={"system"}
  import neynarClient from "@/lib/neynarClient";
  import { mnemonicToAccount } from "viem/accounts";

  export const getFid = async () => {
    if (!process.env.FARCASTER_DEVELOPER_MNEMONIC) {
      throw new Error("FARCASTER_DEVELOPER_MNEMONIC is not set.");
    }

    const account = mnemonicToAccount(process.env.FARCASTER_DEVELOPER_MNEMONIC);

    // Lookup user details using the custody address.
    const { user: farcasterDeveloper } =
      await neynarClient.lookupUserByCustodyAddress({custodyAddress:account.address});

    return Number(farcasterDeveloper.fid);
  };
  ```
</CodeGroup>

We can use this api route on our front end to generate a signature and show the QR code/deep link to the user. So, head over to `app/page.tsx` and add the following:

<CodeGroup>
  ```typescript page.tsx theme={"system"}
  "use client";

  import axios from "axios";
  import QRCode from "qrcode.react";
  import { useState } from "react";
  import styles from "./page.module.css";

  interface FarcasterUser {
    signer_uuid: string;
    public_key: string;
    status: string;
    signer_approval_url?: string;
    fid?: number;
  }

  export default function Home() {
    const LOCAL_STORAGE_KEYS = {
      FARCASTER_USER: "farcasterUser",
    };
    const [loading, setLoading] = useState(false);
    const [farcasterUser, setFarcasterUser] = useState<FarcasterUser | null>(
      null
    );

    const handleSignIn = async () => {
      setLoading(true);
      await createAndStoreSigner();
      setLoading(false);
    };

    const createAndStoreSigner = async () => {
      try {
        const response = await axios.post("/api/signer");
        if (response.status === 200) {
          localStorage.setItem(LOCAL_STORAGE_KEYS.FARCASTER_USER, JSON.stringify(response.data));
          setFarcasterUser(response.data);
        }
      } catch (error) {
        console.error("API Call failed", error);
      }
    };

    return (
      <div className={styles.container}>
        {!farcasterUser?.status && (
          <button
            className={styles.btn}
            onClick={handleSignIn}
            disabled={loading}
          >
            {loading ? "Loading..." : "Sign in with farcaster"}
          </button>
        )}

        {farcasterUser?.status == "pending_approval" &&
          farcasterUser?.signer_approval_url && (
            <div className={styles.qrContainer}>
              <QRCode value={farcasterUser.signer_approval_url} />
              <div className={styles.or}>OR</div>
              <a
                href={farcasterUser.signer_approval_url}
                target="_blank"
                rel="noopener noreferrer"
                className={styles.link}
              >
                Click here to view the signer URL (on mobile)
              </a>
            </div>
          )}
      </div>
    );
  }
  ```
</CodeGroup>

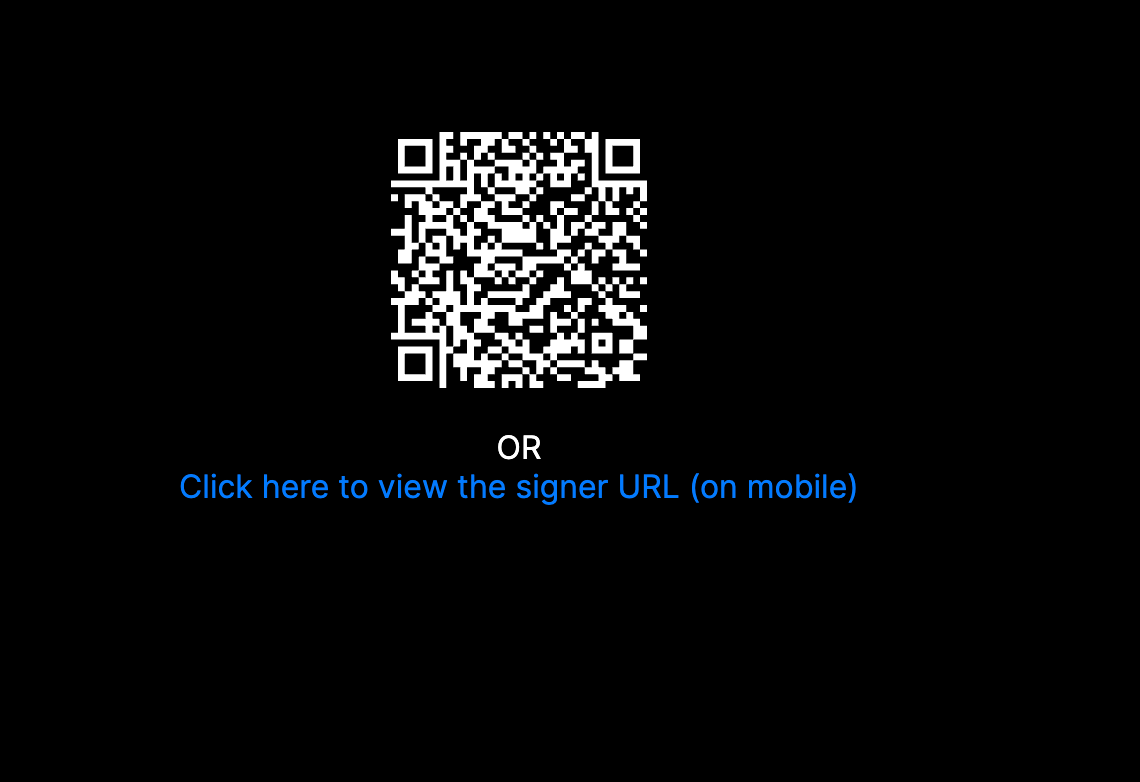
Here, we show a button to sign in with farcaster in case the farcasterUser state is empty which it will be initially. And if the status is "pending\_approval" then we display a QR code and a deep link for mobile view like this:

<Frame>
  <img src="https://mintcdn.com/neynar/aGwjtKmNewHJXSzO/images/docs/54d25f6-image.png?fit=max&auto=format&n=aGwjtKmNewHJXSzO&q=85&s=2b6c9ffd812096ae0fcfcca00b7717cb" alt="Sign in with farcaster" width="1140" height="782" data-path="images/docs/54d25f6-image.png" />
</Frame>

If you try scanning the QR code it will take you to Warpcast to sign into your app! But signing in won't do anything right now, so let's also handle that.

In the `api/signer/route.ts` file let's add a GET function as well to fetch the signer using the signer uuid like this:

<CodeGroup>
  ```typescript route.ts theme={"system"}
  export async function GET(req: Request) {
    const { searchParams } = new URL(req.url);
    const signer_uuid = searchParams.get("signer_uuid");

    if (!signer_uuid) {
      return NextResponse.json(
        { error: "signer_uuid is required" },
        { status: 400 }
      );
    }

    try {
      const signer = await neynarClient.lookupSigner({ signerUuid:signer_uuid});

      return NextResponse.json(signer, { status: 200 });
    } catch (error) {
      return NextResponse.json({ error: "An error occurred" }, { status: 500 });
    }
  }
  ```
</CodeGroup>

Let's use this route in the `page.tsx` file to fetch the signer and set it in local storage using some useEffects:

<CodeGroup>
  ```typescript page.tsx theme={"system"}
  useEffect(() => {
      const storedData = localStorage.getItem(LOCAL_STORAGE_KEYS.FARCASTER_USER);
      if (storedData) {
        const user: FarcasterUser = JSON.parse(storedData);
        setFarcasterUser(user);
      }
    }, []);

    useEffect(() => {
      if (farcasterUser && farcasterUser.status === "pending_approval") {
        let intervalId: NodeJS.Timeout;

        const startPolling = () => {
          intervalId = setInterval(async () => {
            try {
              const response = await axios.get(
                `/api/signer?signer_uuid=${farcasterUser?.signer_uuid}`
              );
              const user = response.data as FarcasterUser;

              if (user?.status === "approved") {
                // store the user in local storage
                localStorage.setItem(
                  LOCAL_STORAGE_KEYS.FARCASTER_USER,
                  JSON.stringify(user)
                );

                setFarcasterUser(user);
                clearInterval(intervalId);
              }
            } catch (error) {
              console.error("Error during polling", error);
            }
          }, 2000);
        };

        const stopPolling = () => {
          clearInterval(intervalId);
        };

        const handleVisibilityChange = () => {
          if (document.hidden) {
            stopPolling();
          } else {
            startPolling();
          }
        };

        document.addEventListener("visibilitychange", handleVisibilityChange);

        // Start the polling when the effect runs.
        startPolling();

        // Cleanup function to remove the event listener and clear interval.
        return () => {
          document.removeEventListener(
            "visibilitychange",
            handleVisibilityChange
          );
          clearInterval(intervalId);
        };
      }
    }, [farcasterUser]);
  ```
</CodeGroup>

Here, we are checking if the user has approved the TX and if they have approved it, we call the signer api and set the user details in the local storage. Let's also add a condition in the return statement to display the fid of the user if they are logged in:

<CodeGroup>
  ```typescript page.tsx theme={"system"}
   {farcasterUser?.status == "approved" && (
          <div className={styles.castSection}>
            <div className={styles.userInfo}>Hello {farcasterUser.fid} 👋</div>
          </div>
        )}
  ```
</CodeGroup>

## Allowing users to write casts

Let's now use the signer that we get from the user to publish casts from within the app. Create a new `api/cast/route.ts` file and add the following:

<CodeGroup>
  ```typescript route.ts theme={"system"}
  import neynarClient from "@/lib/neynarClient";
  import { NextResponse } from "next/server";

  export async function POST(req: Request) {
    const body = await req.json();

    try {

      const cast = await neynarClient.publishCast({signerUuid:body.signer_uuid, text:body.text});

      return NextResponse.json(cast, { status: 200 });
    } catch (error) {
      console.error(error);
      return NextResponse.json({ error: "An error occurred" }, { status: 500 });
    }
  }
  ```
</CodeGroup>

Here, I am using the `publishCast` function to publish a cast using the signer uuid and the text which I am getting from the body of the request.

Head back to the `page.tsx` file and add a `handleCast` function to handle the creation of casts like this:

<CodeGroup>
  ```typescript page.tsx theme={"system"}
  const [text, setText] = useState<string>("");
  const [isCasting, setIsCasting] = useState<boolean>(false);

  const handleCast = async () => {
    setIsCasting(true);
    const castText = text.length === 0 ? "gm" : text;
    try {
      const response = await axios.post("/api/cast", {
        text: castText,
        signer_uuid: farcasterUser?.signer_uuid,
      });
      if (response.status === 200) {
        setText(""); // Clear the text field
        alert("Cast successful");
      }
    } catch (error) {
      console.error("Could not send the cast", error);
    } finally {
      setIsCasting(false); // Re-enable the button
    }
  };
  ```
</CodeGroup>

Now, we just need to add an input to accept the cast text and a button to publish the cast. Let's add it below the hello fid text like this:

<CodeGroup>
  ```typescript page.tsx theme={"system"}
   {farcasterUser?.status == "approved" && (
          <div className={styles.castSection}>
            <div className={styles.userInfo}>Hello {farcasterUser.fid} 👋</div>
            <div className={styles.castContainer}>
              <textarea
                className={styles.castTextarea}
                placeholder="What's on your mind?"
                value={text}
                onChange={(e) => setText(e.target.value)}
                rows={5}
              />

              <button
                className={styles.btn}
                onClick={handleCast}
                disabled={isCasting}
              >
                {isCasting ? <span>🔄</span> : "Cast"}
              </button>
            </div>
          </div>
        )}
  ```
</CodeGroup>

Your final `page.tsx` file should look similar to this:

<CodeGroup>
  ```typescript page.tsx theme={"system"}
  "use client";

  import axios from "axios";
  import QRCode from "qrcode.react";
  import { useEffect, useState } from "react";
  import styles from "./page.module.css";

  interface FarcasterUser {
    signer_uuid: string;
    public_key: string;
    status: string;
    signer_approval_url?: string;
    fid?: number;
  }

  export default function Home() {
    const LOCAL_STORAGE_KEYS = {
      FARCASTER_USER: "farcasterUser",
    };
    const [loading, setLoading] = useState(false);
    const [farcasterUser, setFarcasterUser] = useState<FarcasterUser | null>(
      null
    );
    const [text, setText] = useState<string>("");
    const [isCasting, setIsCasting] = useState<boolean>(false);

    const handleCast = async () => {
      setIsCasting(true);
      const castText = text.length === 0 ? "gm" : text;
      try {
        const response = await axios.post("/api/cast", {
          text: castText,
          signer_uuid: farcasterUser?.signer_uuid,
        });
        if (response.status === 200) {
          setText(""); // Clear the text field
          alert("Cast successful");
        }
      } catch (error) {
        console.error("Could not send the cast", error);
      } finally {
        setIsCasting(false); // Re-enable the button
      }
    };

    useEffect(() => {
      const storedData = localStorage.getItem(LOCAL_STORAGE_KEYS.FARCASTER_USER);
      if (storedData) {
        const user: FarcasterUser = JSON.parse(storedData);
        setFarcasterUser(user);
      }
    }, []);

    useEffect(() => {
      if (farcasterUser && farcasterUser.status === "pending_approval") {
        let intervalId: NodeJS.Timeout;

        const startPolling = () => {
          intervalId = setInterval(async () => {
            try {
              const response = await axios.get(
                `/api/signer?signer_uuid=${farcasterUser?.signer_uuid}`
              );
              const user = response.data as FarcasterUser;

              if (user?.status === "approved") {
                // store the user in local storage
                localStorage.setItem(
                  LOCAL_STORAGE_KEYS.FARCASTER_USER,
                  JSON.stringify(user)
                );

                setFarcasterUser(user);
                clearInterval(intervalId);
              }
            } catch (error) {
              console.error("Error during polling", error);
            }
          }, 2000);
        };

        const stopPolling = () => {
          clearInterval(intervalId);
        };

        const handleVisibilityChange = () => {
          if (document.hidden) {
            stopPolling();
          } else {
            startPolling();
          }
        };

        document.addEventListener("visibilitychange", handleVisibilityChange);

        // Start the polling when the effect runs.
        startPolling();

        // Cleanup function to remove the event listener and clear interval.
        return () => {
          document.removeEventListener(
            "visibilitychange",
            handleVisibilityChange
          );
          clearInterval(intervalId);
        };
      }
    }, [farcasterUser]);

    const handleSignIn = async () => {
      setLoading(true);
      await createAndStoreSigner();
      setLoading(false);
    };

    const createAndStoreSigner = async () => {
      try {
        const response = await axios.post("/api/signer");
        if (response.status === 200) {
          localStorage.setItem(
            LOCAL_STORAGE_KEYS.FARCASTER_USER,
            JSON.stringify(response.data)
          );
          setFarcasterUser(response.data);
        }
      } catch (error) {
        console.error("API Call failed", error);
      }
    };

    return (
      <div className={styles.container}>
        {!farcasterUser?.status && (
          <button
            className={styles.btn}
            onClick={handleSignIn}
            disabled={loading}
          >
            {loading ? "Loading..." : "Sign in with farcaster"}
          </button>
        )}

        {farcasterUser?.status == "pending_approval" &&
          farcasterUser?.signer_approval_url && (
            <div className={styles.qrContainer}>
              <QRCode value={farcasterUser.signer_approval_url} />
              <div className={styles.or}>OR</div>
              <a
                href={farcasterUser.signer_approval_url}
                target="_blank"
                rel="noopener noreferrer"
                className={styles.link}
              >
                Click here to view the signer URL (on mobile)
              </a>
            </div>
          )}

        {farcasterUser?.status == "approved" && (
          <div className={styles.castSection}>
            <div className={styles.userInfo}>Hello {farcasterUser.fid} 👋</div>
            <div className={styles.castContainer}>
              <textarea
                className={styles.castTextarea}
                placeholder="What's on your mind?"
                value={text}
                onChange={(e) => setText(e.target.value)}
                rows={5}
              />

              <button
                className={styles.btn}
                onClick={handleCast}
                disabled={isCasting}
              >
                {isCasting ? <span>🔄</span> : "Cast"}
              </button>
            </div>
          </div>
        )}
      </div>
    );
  }
  ```
</CodeGroup>

If you now try going through the whole flow of signing in and creating a cast, everything should work seamlessly!

<Info>
  ### Read more [Two Ways to Sponsor a Farcaster Signer via Neynar](/docs/two-ways-to-sponsor-a-farcaster-signer-via-neynar) to see how to *sponsor a signer* on behalf of the user
</Info>

## Conclusion

This guide taught us how to integrate neynar managed signers into your next.js app to add sign-in with Farcaster! If you want to look at the completed code, check out the [GitHub repository](https://github.com/neynarxyz/farcaster-examples/tree/main/managed-signers).

Lastly, please share what you built with us on Farcaster by tagging [@neynar](https://warpcast.com/neynar) and if you have any questions, reach out to us on [warpcast](https://warpcast.com/~/channel/neynar) or [Slack](https://neynar.com/slack)!
