> ## Documentation Index
> Fetch the complete documentation index at: https://docs.neynar.com/llms.txt
> Use this file to discover all available pages before exploring further.
# SIWN: React Native
> In this guide, we'll take a look at how to add sign-in with neynar to a React native application!
## Setting up your application
### Prerequisites
* [Node.js](https://nodejs.org/en/): A JavaScript runtime built on Chrome's V8 JavaScript engine. Ensure you have Node.js installed on your system.
* [Expo Go](https://expo.dev/client): Install Expo Go on your phone
### Cloning the repo
Clone the repo from GitHub using the following command and open it up in your favourite code editor using the following commands:
```bash theme={"system"}
npx degit https://github.com/neynarxyz/farcaster-examples/tree/main/wownar-react-native react-native-siwn
cd react-native-siwn
```
Once you've cloned your repo we can start installing the packages and setting up the env variables!
### Server
Navigate to the server directory
```bash Bash theme={"system"}
cd server
```
Based on the package manager run one of the following commands to install all required dependencies:
```powershell npm theme={"system"}
npm i
```
```powershell yarn theme={"system"}
yarn install
```
```powershell pnpm theme={"system"}
pnpm i
```
```powershell bun theme={"system"}
bun i
```
Copy the example environment file:
```bash Bash theme={"system"}
cp .env.example .env
```
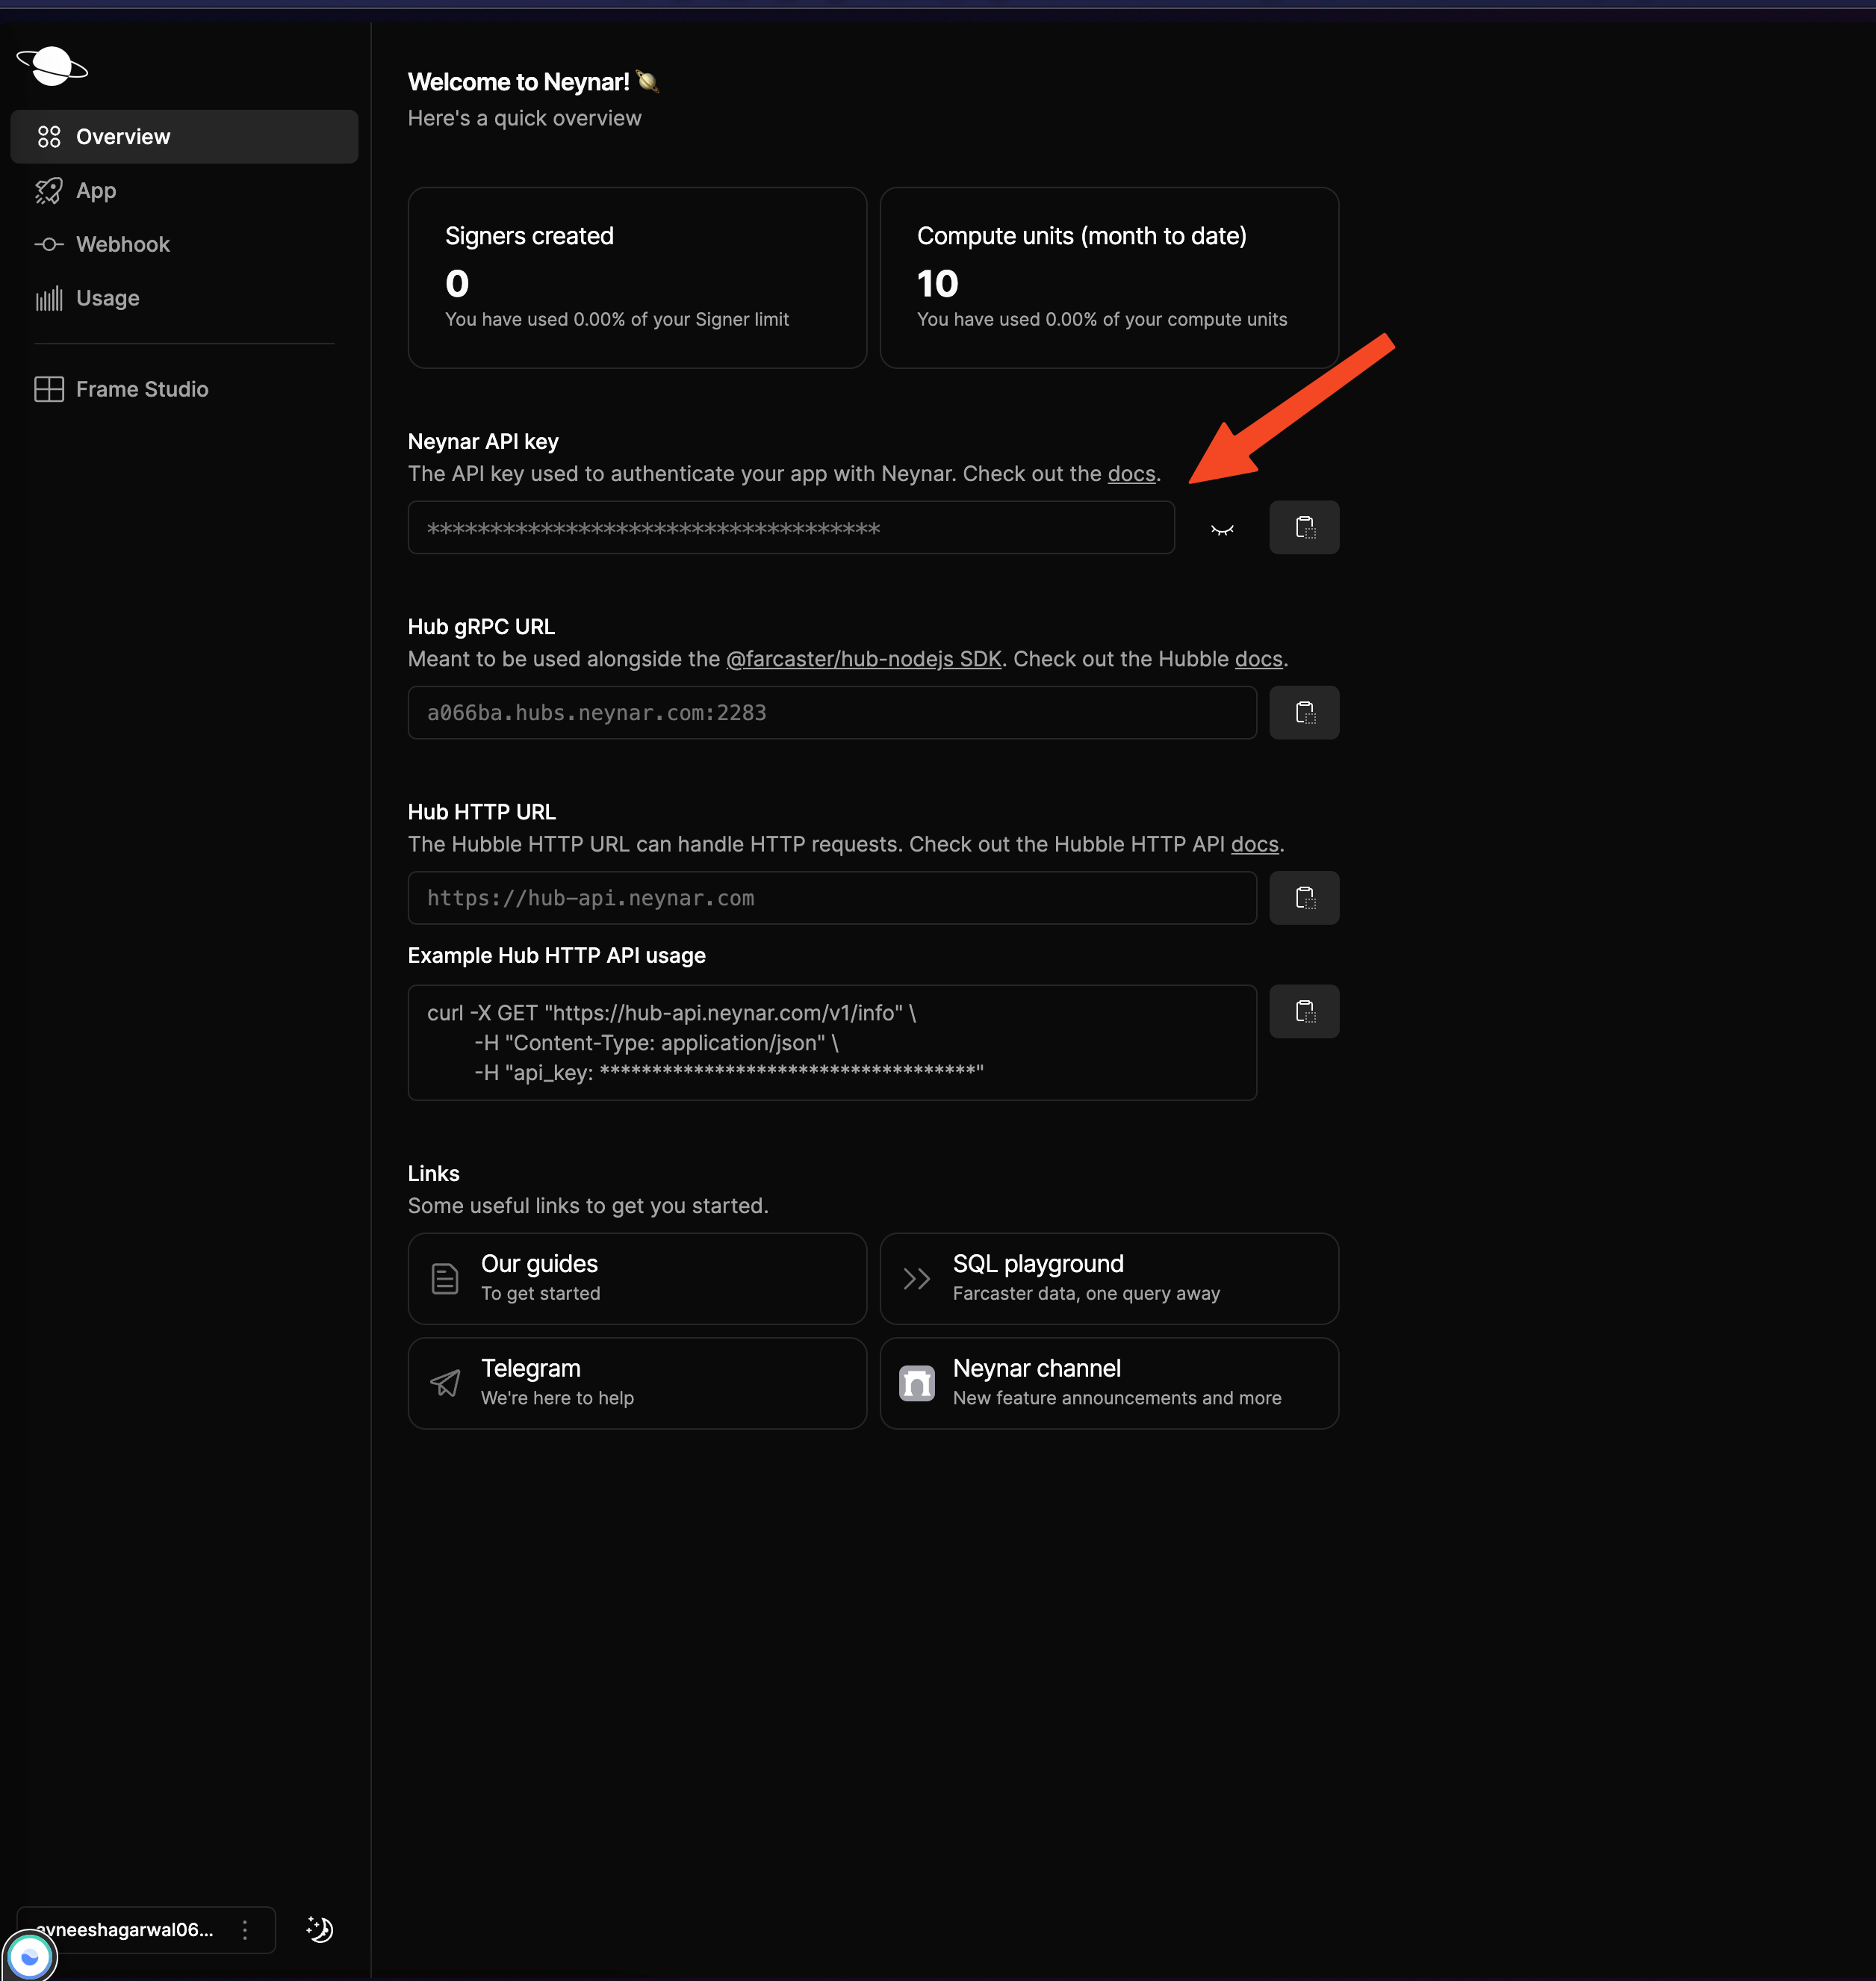
Edit `.env` to add your `NEYNAR_API_KEY` and `NEYNAR_CLIENT_ID`. You can find them in your dashboard
 Start the server:
```Text npm theme={"system"}
npm run start
```
```Text yarn theme={"system"}
yarn start
```
```Text pnpm theme={"system"}
pnpm run start
```
```Text bun theme={"system"}
bun run start
```
### Client
Open new terminal
Navigate to the client directory
```bash Bash theme={"system"}
cd client
```
Based on the package manager run one of the following commands to install all required dependencies:
For yarn
```bash Bash theme={"system"}
yarn install
```
For npm
```bash Bash theme={"system"}
npm install
```
Copy the example environment file:
```bash Bash theme={"system"}
cp .env.example .env
```
* Edit `.env` to add your `COMPUTER_IP_ADDRESS`. Refer [find-IP-address article](https://www.avg.com/en/signal/find-ip-address) to get the IP address of your Computer.
Make sure your phone and computer is connected to the same network
For yarn
```bash Bash theme={"system"}
yarn start
```
For npm
```bash Bash theme={"system"}
npm run start
```
you'll see a QR Code
Open the [Expo Go app](https://expo.dev/go) on your phone and scan the QR Code. You should now be able to see a button to sign in with neynar in your app!
## How does it work?
You're probably wondering how it all works, so let's break it down!
### Server
In our server, we have 3 API routes, you can take a look at them in `server/index.js`:
* `/get-auth-url` (GET): This API route gets the authorization URL using the `fetchAuthorizationUrl` function from the neynar client.
* `/user` (GET): This API route takes in the fid as a query parameter and returns the user data like display name and pfp url using the `fetchBulkUsers` function.
* `/cast` (POST): This API route takes in the signer UUID and text in the body and publishes the cast on behalf of the user using the `publishCast` function.
### Client
On the client side, we use the `NeynarSigninButton` component from the `@neynar/react-native-signin` package and pass in a bunch of props like `fetchAuthorizationUrl`, `successCallback`, `errorCallback`, and `redirectUrl`.
* For `fetchAuthorizationUrl` we fetch the url from our server and then pass it.
* For `successCallback` we are creating a function `Context/AppContext.ts` that fetches the user info from the backend and safely stores it.
* For `errorCallBack` we simply just console log the error.
* For `redirectURL` we are using a URL of the format `exp://${COMPUTER_IP_ADDRESS}:8081`. The `COMPUTER_IP_ADDRESS` is the one you added in your `.env` file
* There are also a lot of customisation options that you can find commented out in the `Signin.tsx` file.
## Conclusion
This guide taught us how to add sign-in with neynar to a React native app, check out the [GitHub repository](https://github.com/neynarxyz/farcaster-examples/tree/main/wownar-react-native).
Lastly, make sure to sure what you built with us on Farcaster by tagging [@neynar](https://warpcast.com/neynar) and if you have any questions, reach out to us on [warpcast](https://warpcast.com/~/channel/neynar) or [Slack](https://neynar.com/slack)!
Start the server:
```Text npm theme={"system"}
npm run start
```
```Text yarn theme={"system"}
yarn start
```
```Text pnpm theme={"system"}
pnpm run start
```
```Text bun theme={"system"}
bun run start
```
### Client
Open new terminal
Navigate to the client directory
```bash Bash theme={"system"}
cd client
```
Based on the package manager run one of the following commands to install all required dependencies:
For yarn
```bash Bash theme={"system"}
yarn install
```
For npm
```bash Bash theme={"system"}
npm install
```
Copy the example environment file:
```bash Bash theme={"system"}
cp .env.example .env
```
* Edit `.env` to add your `COMPUTER_IP_ADDRESS`. Refer [find-IP-address article](https://www.avg.com/en/signal/find-ip-address) to get the IP address of your Computer.
Make sure your phone and computer is connected to the same network
For yarn
```bash Bash theme={"system"}
yarn start
```
For npm
```bash Bash theme={"system"}
npm run start
```
you'll see a QR Code
Open the [Expo Go app](https://expo.dev/go) on your phone and scan the QR Code. You should now be able to see a button to sign in with neynar in your app!
## How does it work?
You're probably wondering how it all works, so let's break it down!
### Server
In our server, we have 3 API routes, you can take a look at them in `server/index.js`:
* `/get-auth-url` (GET): This API route gets the authorization URL using the `fetchAuthorizationUrl` function from the neynar client.
* `/user` (GET): This API route takes in the fid as a query parameter and returns the user data like display name and pfp url using the `fetchBulkUsers` function.
* `/cast` (POST): This API route takes in the signer UUID and text in the body and publishes the cast on behalf of the user using the `publishCast` function.
### Client
On the client side, we use the `NeynarSigninButton` component from the `@neynar/react-native-signin` package and pass in a bunch of props like `fetchAuthorizationUrl`, `successCallback`, `errorCallback`, and `redirectUrl`.
* For `fetchAuthorizationUrl` we fetch the url from our server and then pass it.
* For `successCallback` we are creating a function `Context/AppContext.ts` that fetches the user info from the backend and safely stores it.
* For `errorCallBack` we simply just console log the error.
* For `redirectURL` we are using a URL of the format `exp://${COMPUTER_IP_ADDRESS}:8081`. The `COMPUTER_IP_ADDRESS` is the one you added in your `.env` file
* There are also a lot of customisation options that you can find commented out in the `Signin.tsx` file.
## Conclusion
This guide taught us how to add sign-in with neynar to a React native app, check out the [GitHub repository](https://github.com/neynarxyz/farcaster-examples/tree/main/wownar-react-native).
Lastly, make sure to sure what you built with us on Farcaster by tagging [@neynar](https://warpcast.com/neynar) and if you have any questions, reach out to us on [warpcast](https://warpcast.com/~/channel/neynar) or [Slack](https://neynar.com/slack)!