If your goal is to get started as quickly as possible, consider a managed service like Neynar instead of running your own node.
Launch a new instance
- In AWS, go to EC2 > Instances > Launch Instances
- Give it a name and select Ubuntu Server 22.04 LTS (HVM), SSD Volume Type and 64-bit (x86). Choose m5.xlarge instance type.
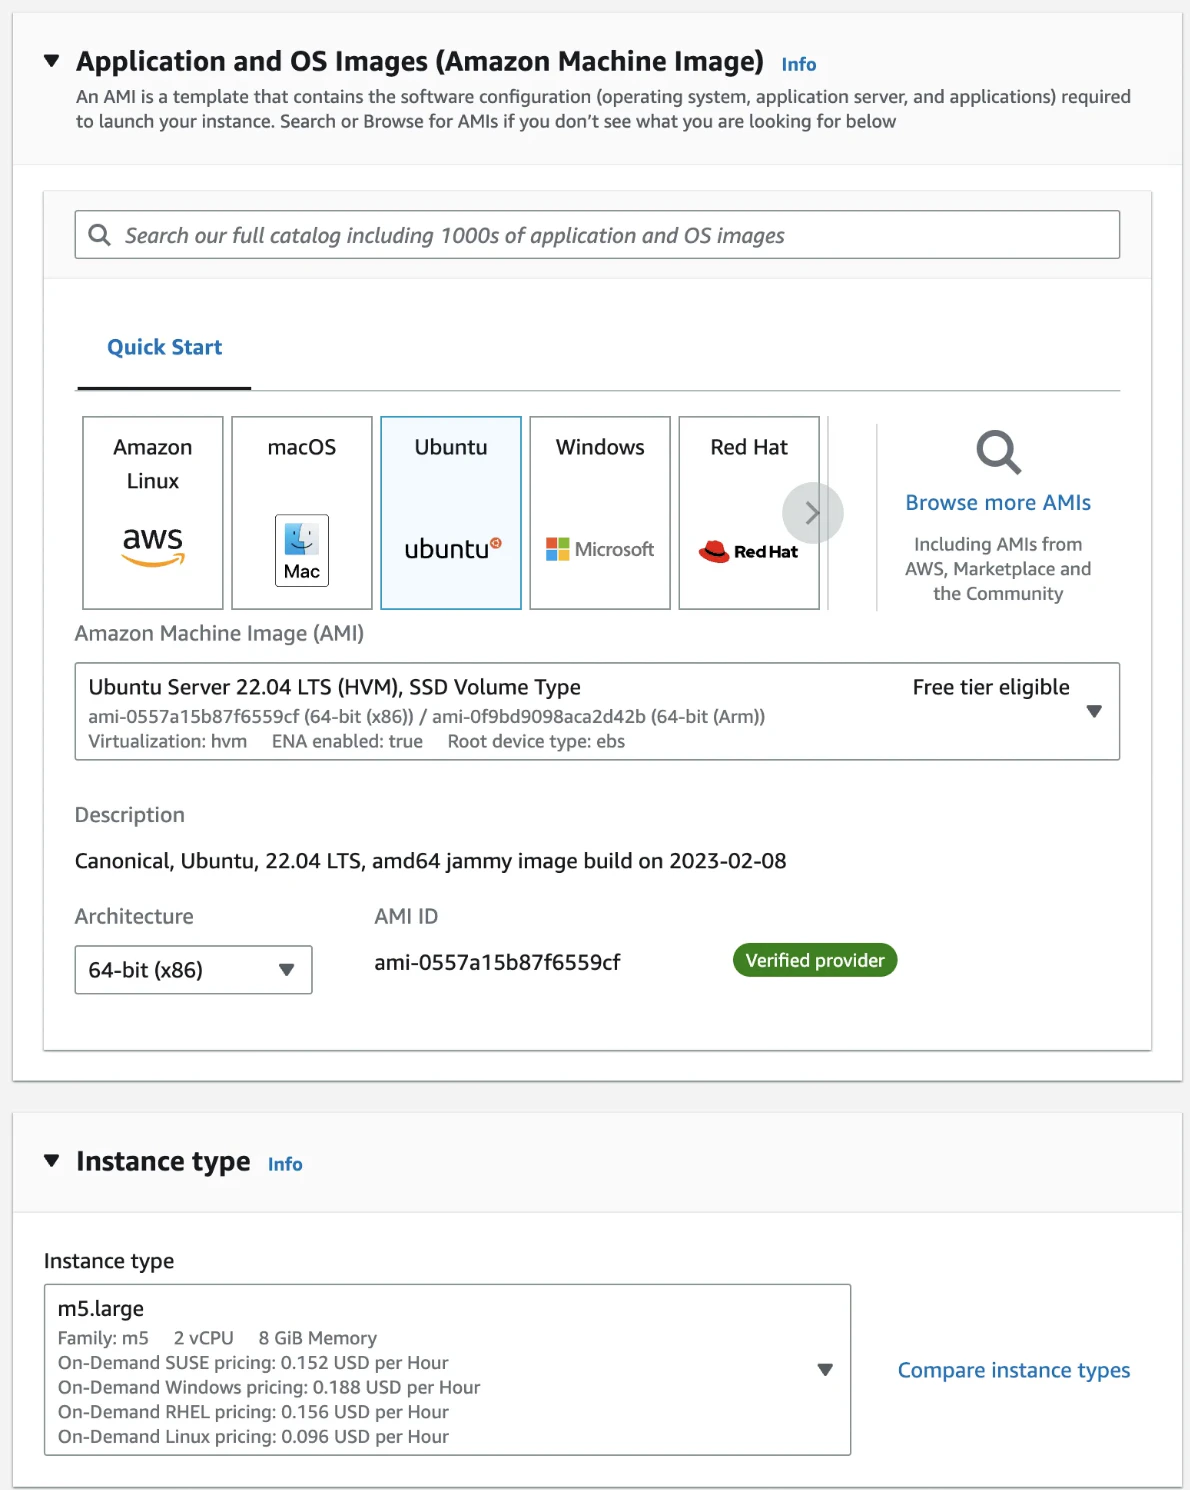
- In Key pair (login), select Create a new key pair, then select RSA and .pem format, and save it
- In Network settings, select Allow SSH traffic from Anywhere
- In Configure storage, select 2 TB of gp3 storage.
- Click Launch Instance on the right-hand side menu.
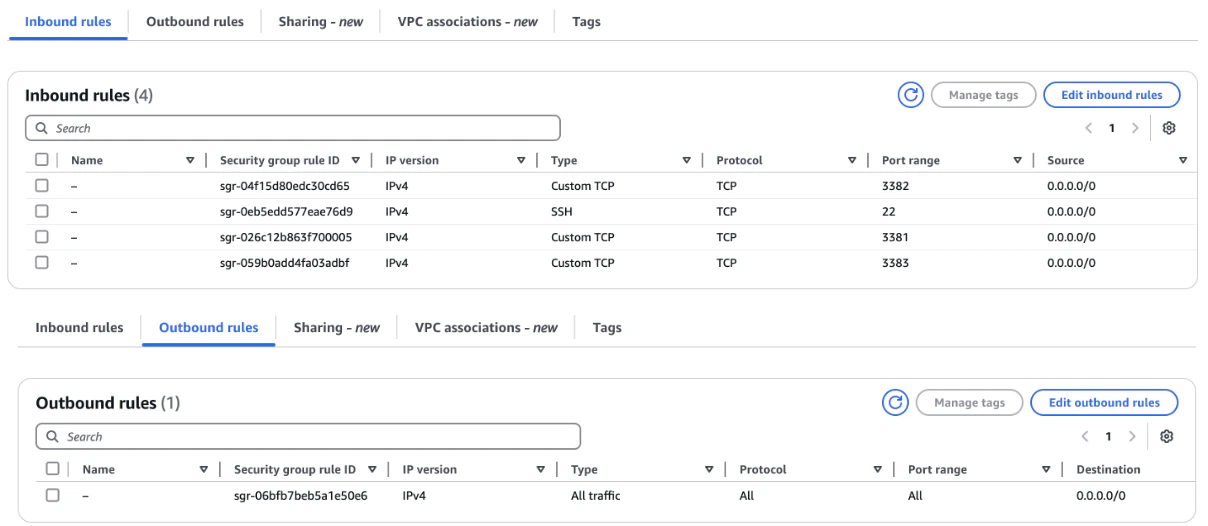
Configure network firewall
- Go to EC2 → Instances and find your instance
- Click on the Instance ID
- Click on Security > Security groups > (Security Group ID)
- Click on Edit inbound rules and Edit outbound rules on the group page and add rules until they match the below.
Connect to your instance
- Find your .pem file from earlier and run
chmod 400 key.pem - Go to EC2 → Instances, click on the Instance ID and copy the IPv4 Address
- Connect with
ssh ubuntu@<ipv4 address> -i key.pem