{
created_at: 1708025006,
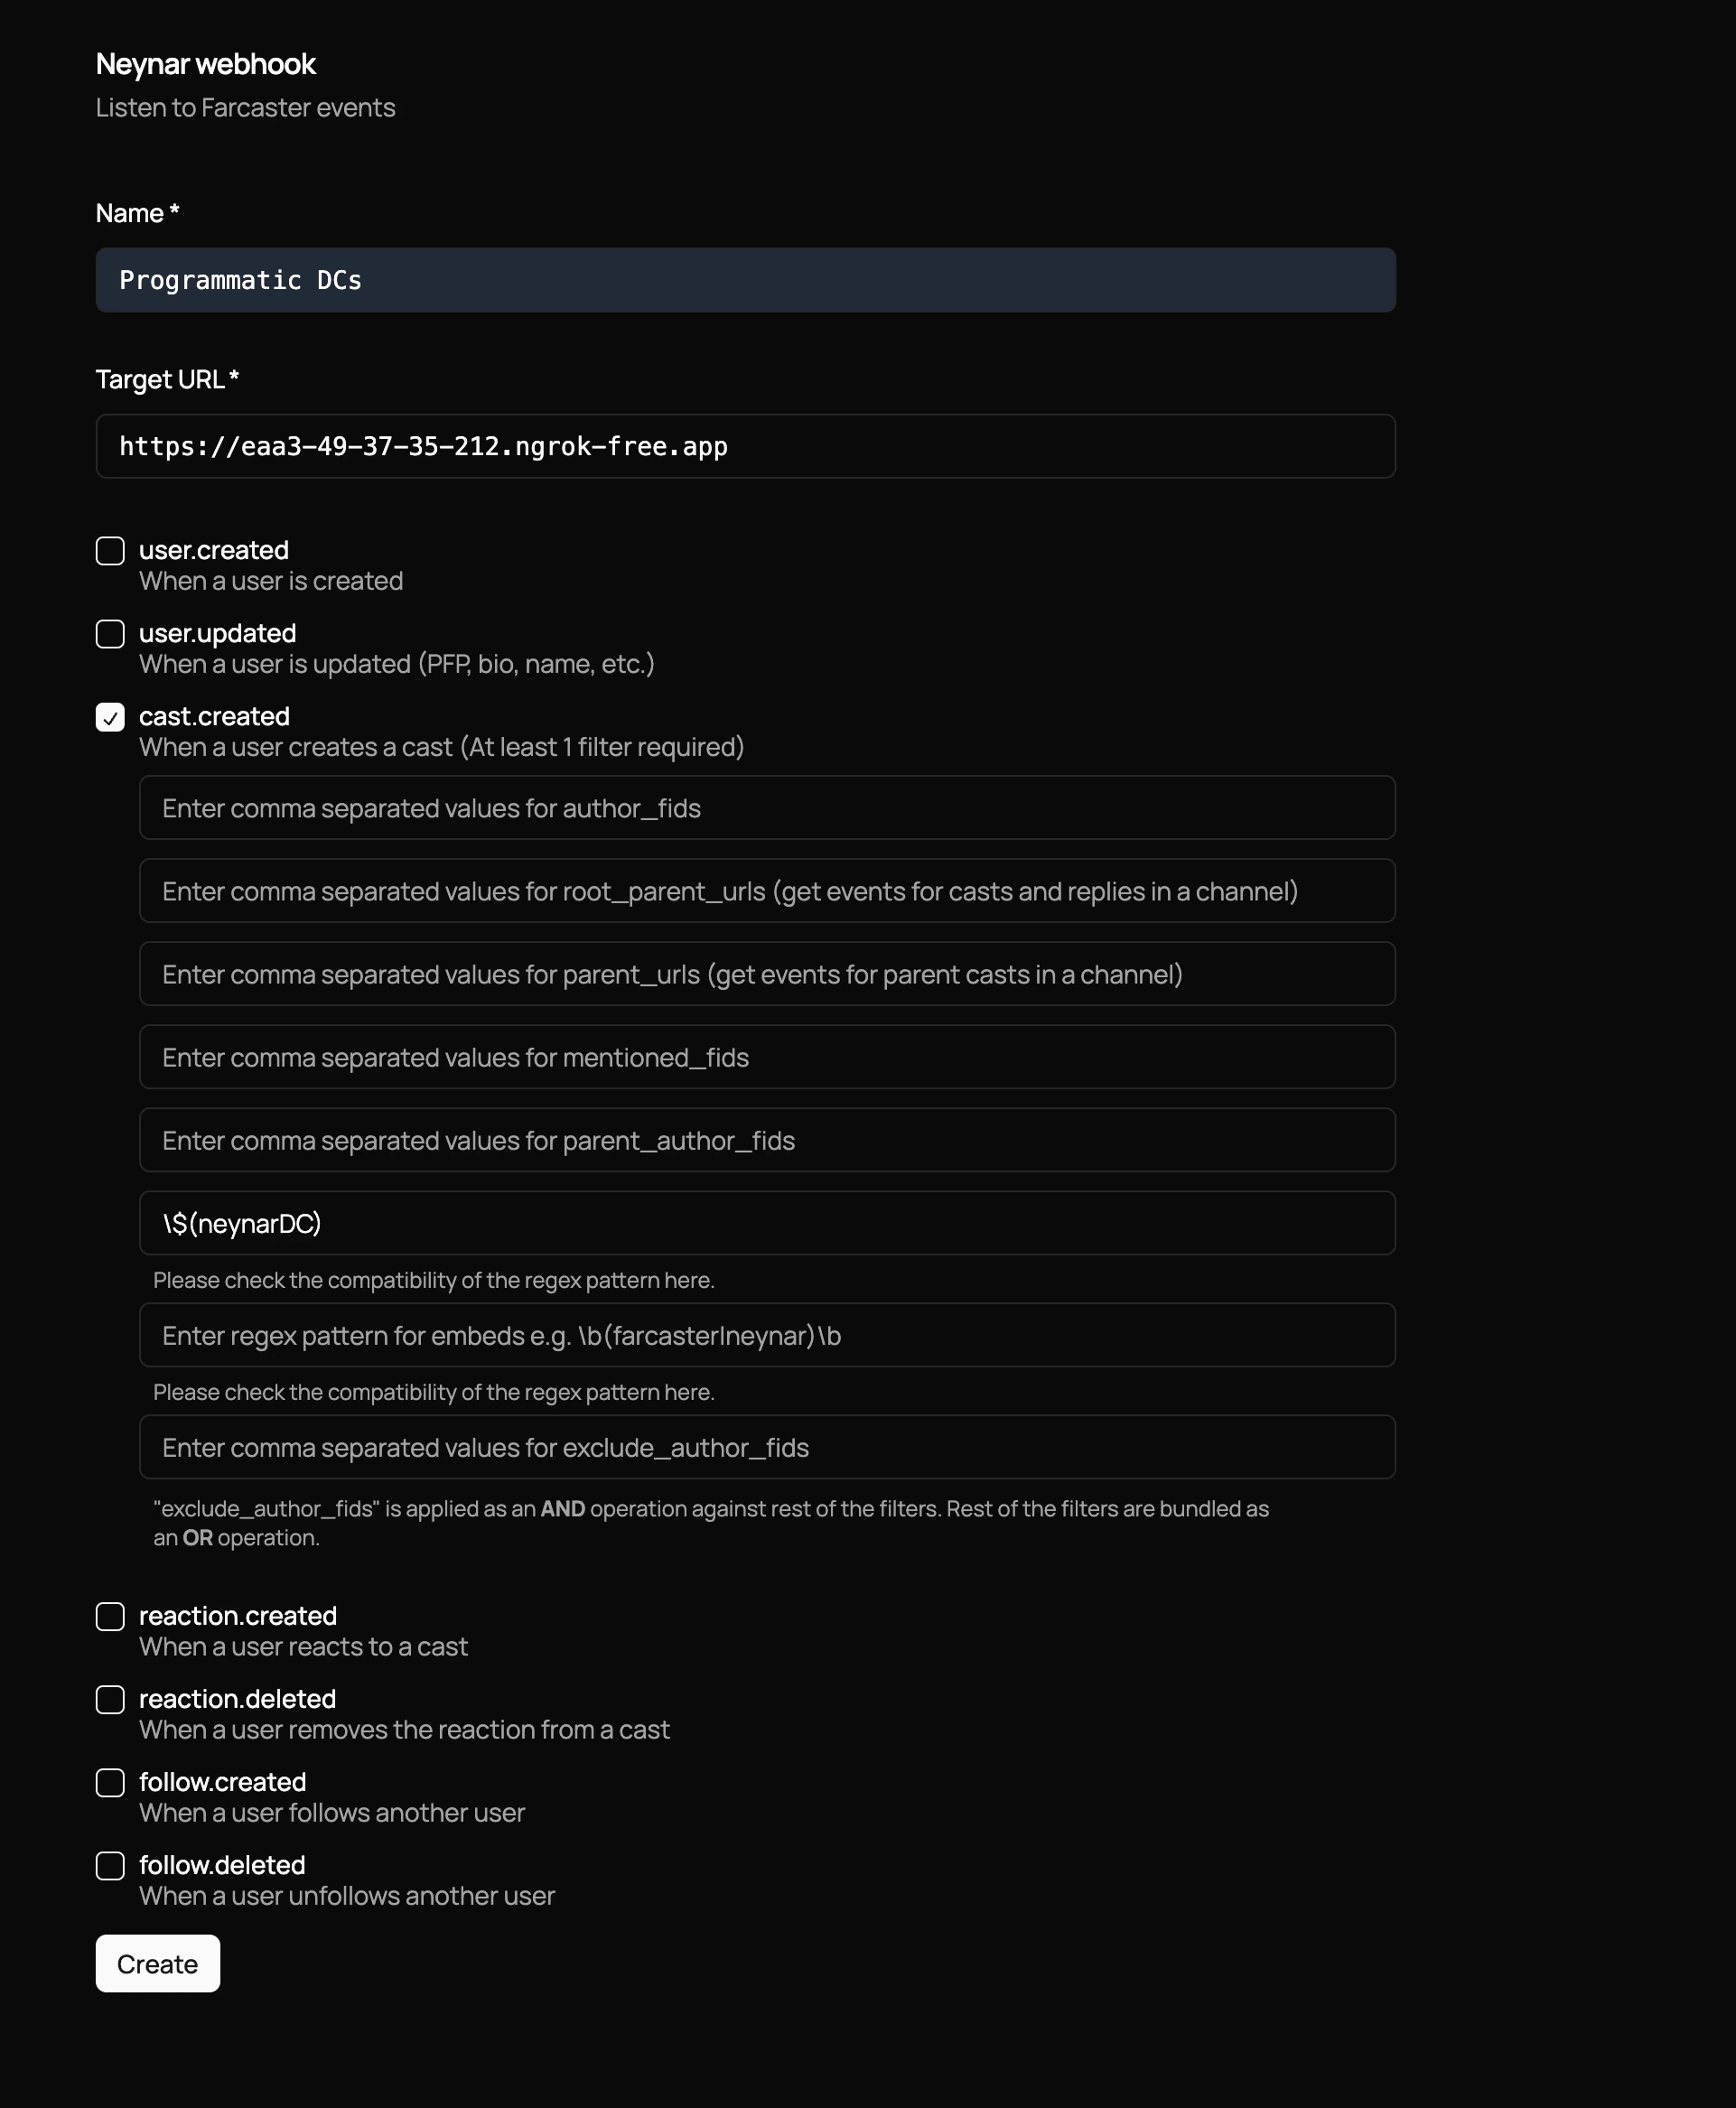
type: "cast.created",
data: {
object: "cast",
hash: "0xfe7908021a4c0d36d5f7359975f4bf6eb9fbd6f2",
thread_hash: "0xfe7908021a4c0d36d5f7359975f4bf6eb9fbd6f2",
parent_hash: null,
parent_url: "chain://eip155:1/erc721:0xfd8427165df67df6d7fd689ae67c8ebf56d9ca61",
root_parent_url: "chain://eip155:1/erc721:0xfd8427165df67df6d7fd689ae67c8ebf56d9ca61",
parent_author: {
fid: null,
},
author: {
object: "user",
fid: 234506,
custody_address: "0x3ee6076e78c6413c8a3e1f073db01f87b63923b0",
username: "balzgolf",
display_name: "Balzgolf",
pfp_url: "https://i.imgur.com/U7ce6gU.jpg",
profile: [Object ...],
follower_count: 65,
following_count: 110,
verifications: [ "0x8c16c47095a003b726ce8deffc39ee9cb1b9f124" ],
active_status: "inactive",
},
text: "neynarDC",
timestamp: "2024-02-15T19:23:22.000Z",
embeds: [],
reactions: {
likes: [],
recasts: [],
},
replies: {
count: 0,
},
mentioned_profiles: [],
},
}