This tutorial refers to these two APIs: Send notifications, List of frame notification tokens
Overview
Farcaster miniapps enable developers to send notifications to users who have added the mini app to their Farcaster client and enabled notifications. Neynar provides a simple way to:- manage approved notification tokens, no need to store on developer side
- send notifications in a single API call, no need to batch
- automate handling of notification permission revokes, and mini app “remove” events
- target notifications to specific user cohorts
- send notifications using the dev portal without having to write code
- track notification analytics including open rates
Set up Notifications
Step 1: Add events webhook URL to Mini App Manifest
a) Locate the Neynar frame events webhook URL
The Neynar mini app events webhook URL is on the Neynar app page. Navigate to dev.neynar.com/app and then click on the app. It should be in this format -https://api.neynar.com/f/app/<your_client_id>/event. See the highlighted URL in the image below.

b) Set this URL in the mini app manifest
Frame servers must provide a JSON manifest file on their domain at the well-known URI. for examplehttps://your-frame-domain.com/.well-known/farcaster.json.
Set the Neynar frame events URL as the webhookUrl to the Frame Config object inside the manifest. Here’s an example manifest
Frame manifest caching
Farcaster clients might have your mini app manifest cached and would only get updated on a periodic basis.If you’re using Warpcast to test, you can go their Settings > Developer Tools > Domains, put in your Frame URL and hit the Check domain status to force a refresh.Step 2: Prompt users to add your Mini App
a) Install @neynar/react
b) Set up the MiniAppProvider context provider
Wrap your app with theMiniAppProvider component:
c) Prompt the user to add your mini app using the useMiniApp hook
added is true and notificationDetails is a valid object, then the client should have called POST to the Neynar frame events webhook URL with the same details.
Neynar will manage all mini app add/remove & notifications enabled/disabled events delivered on this events webhook.
Alternative: Using the Mini App SDK directly
If you prefer to use the Mini App SDK directly instead of the Neynar React components:Step 3: Send a notification to users
Notifications can be broadcast to all your mini app users with notifications enabled or to a limited set of FIDs. Notifications can also be filtered so that only users meeting certain criteria receive the notification. Thetarget_fids parameter is the starting point for all filtering. Pass an empty array for target_fids to start with the set of all FIDs with notifications enabled for your app, or manually define target_fids to list specific FIDs.
a) Target specific users with filters via the Neynar dev portal
The Neynar dev portal offers the same functionality as the API for broadcasting notifications. Navigate to your app and click the “Mini App” tab. Once your mini app is configured with your Neynar webhook URL and users have enabled notifications for your mini app, you’ll see a “Broadcast Notification” section with an exandable filters section.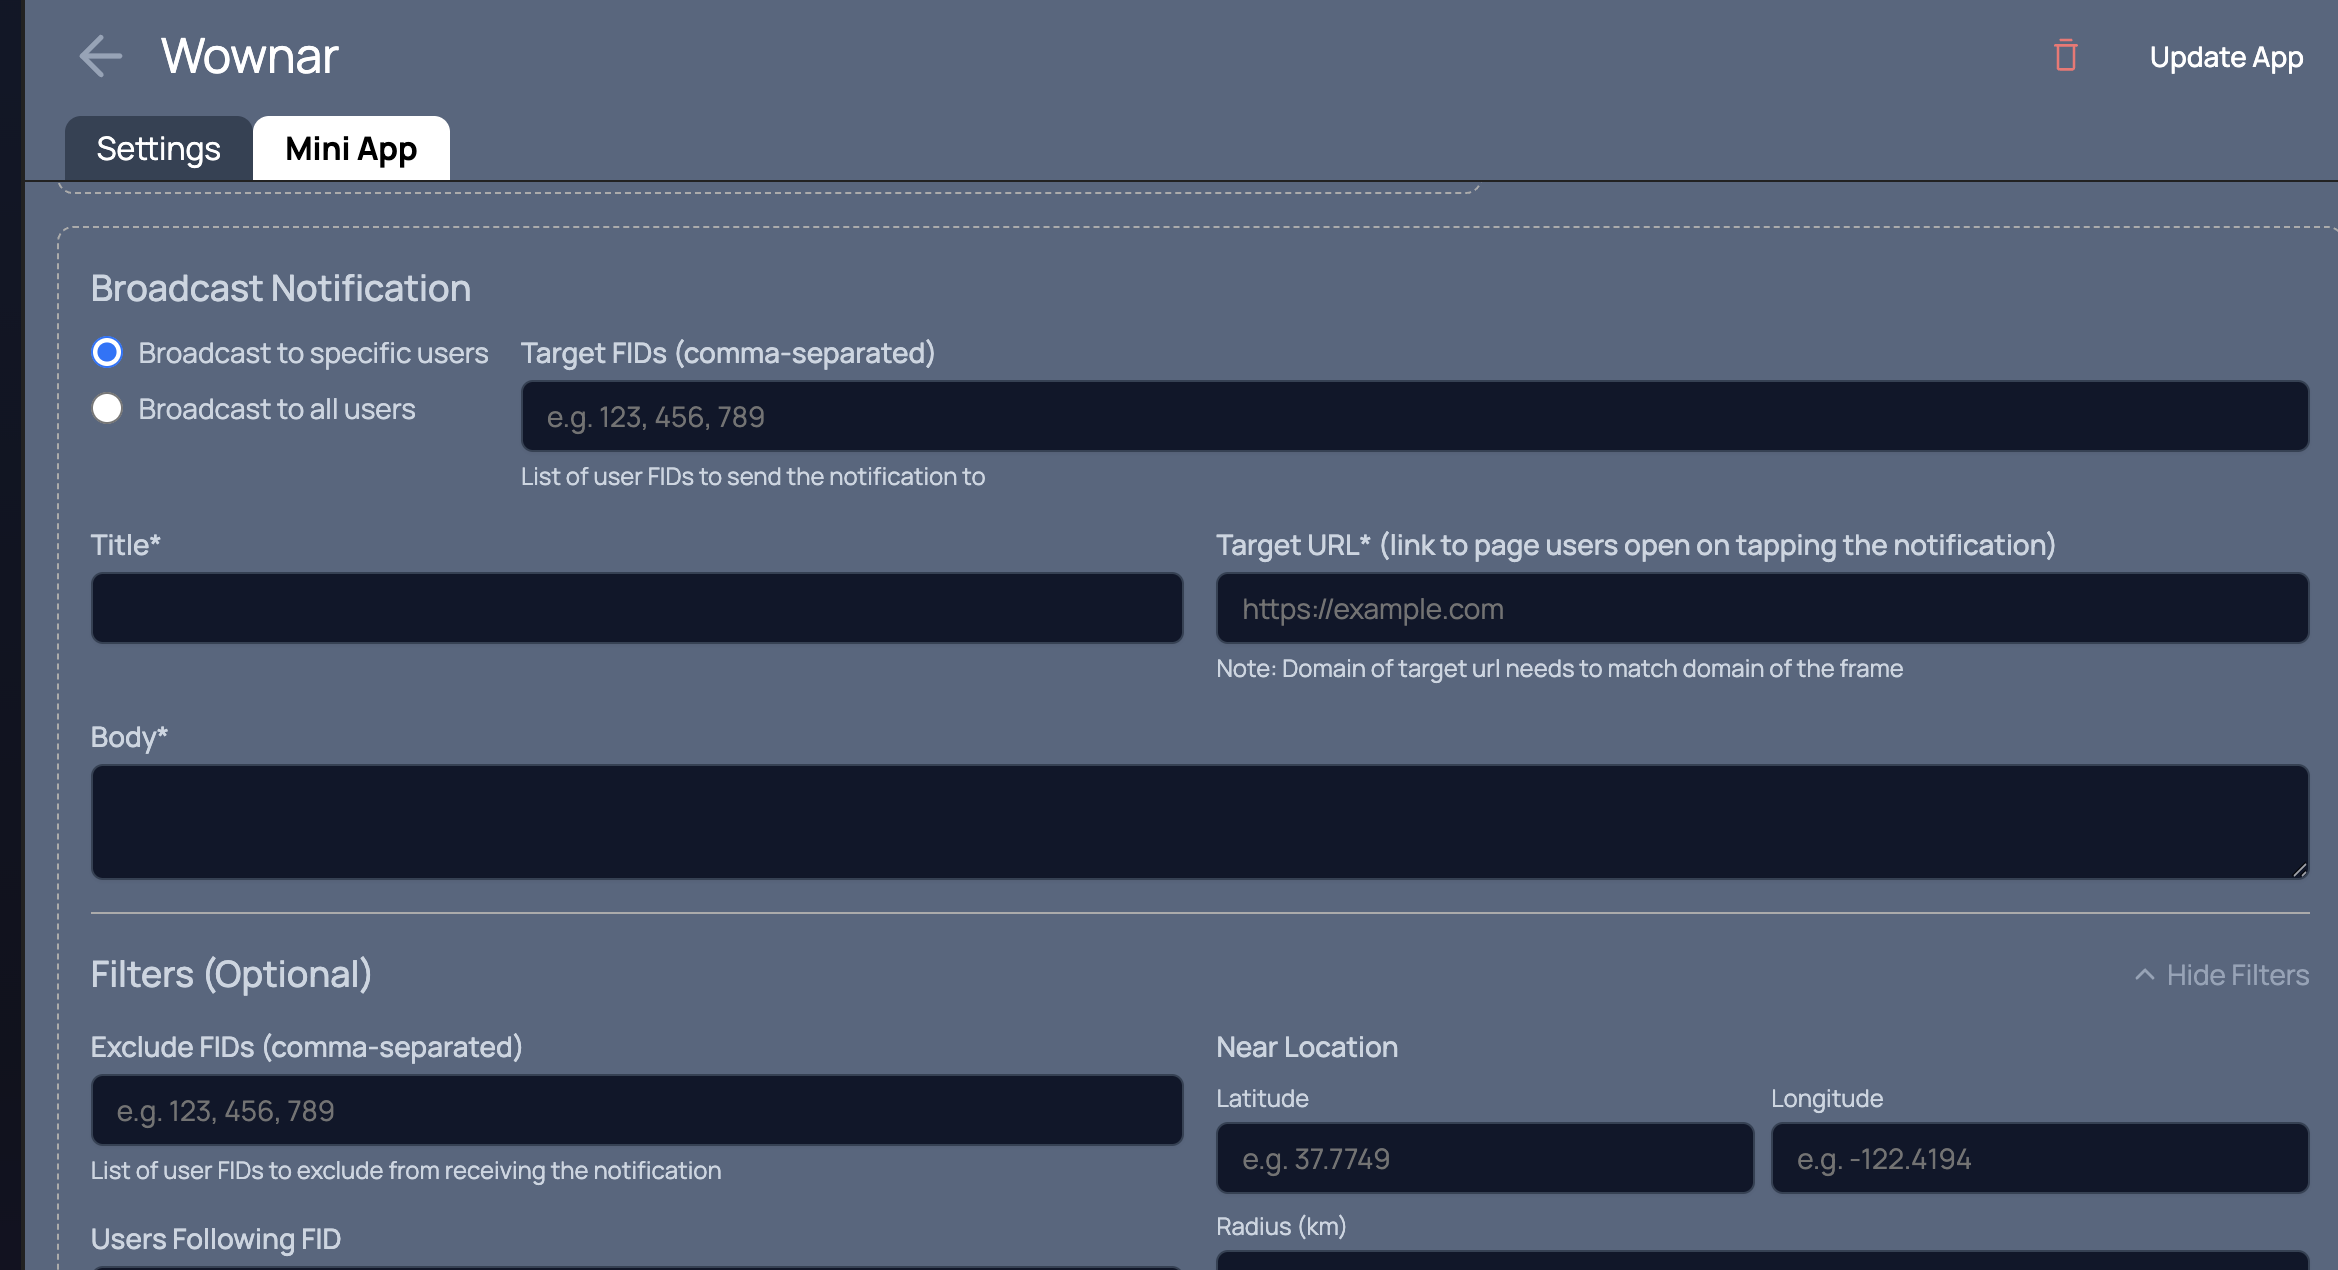
b) Target specific users with filters via the API
The following example uses the @neynar/nodejs-sdk to send notifications to users and includes a set of filtering criteria.Step 4: Check analytics
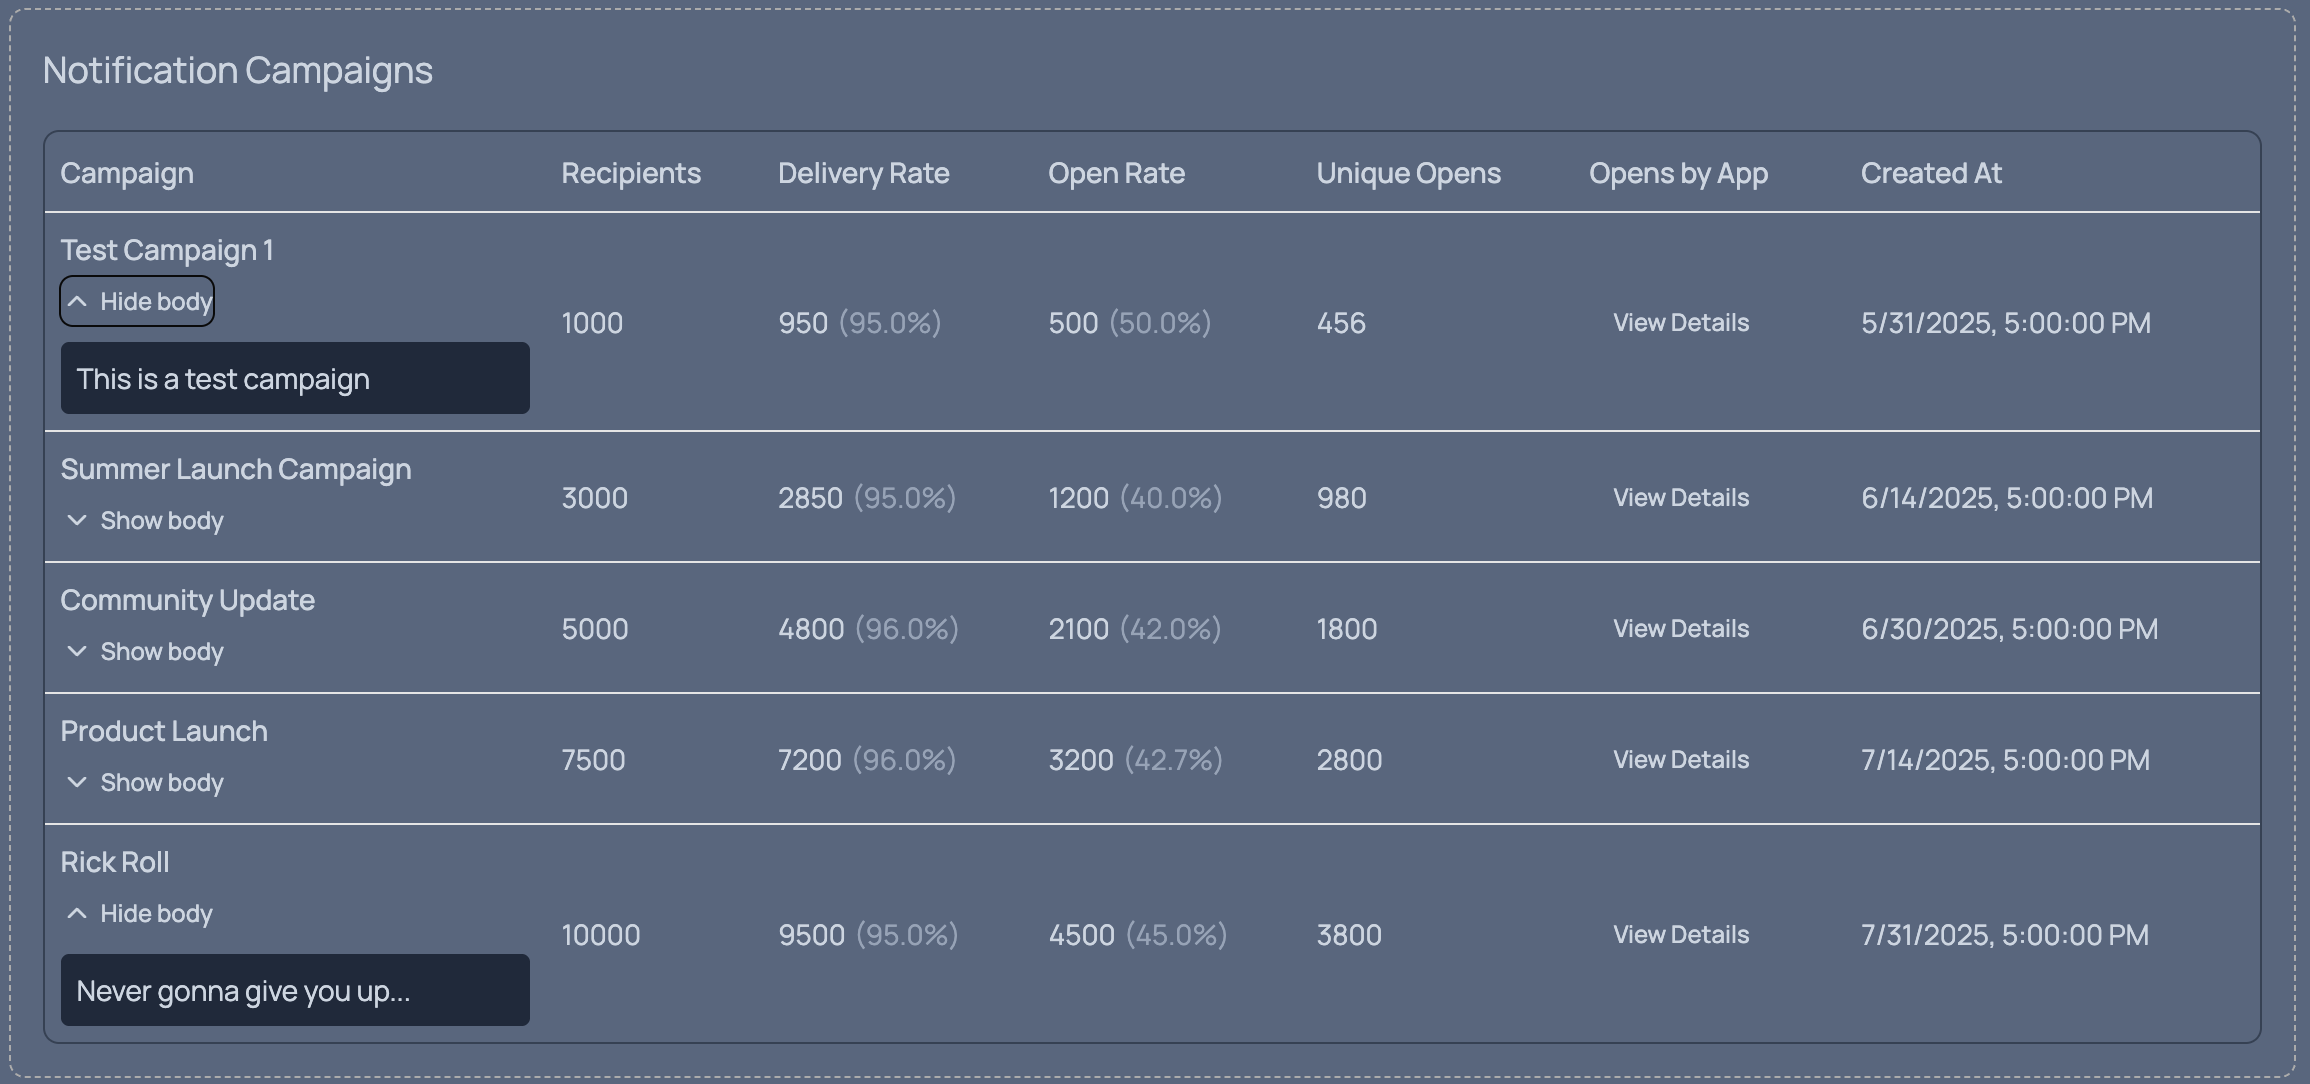
Notification analytics will automatically show in your developer portal once you start using Neynar for frame notifications.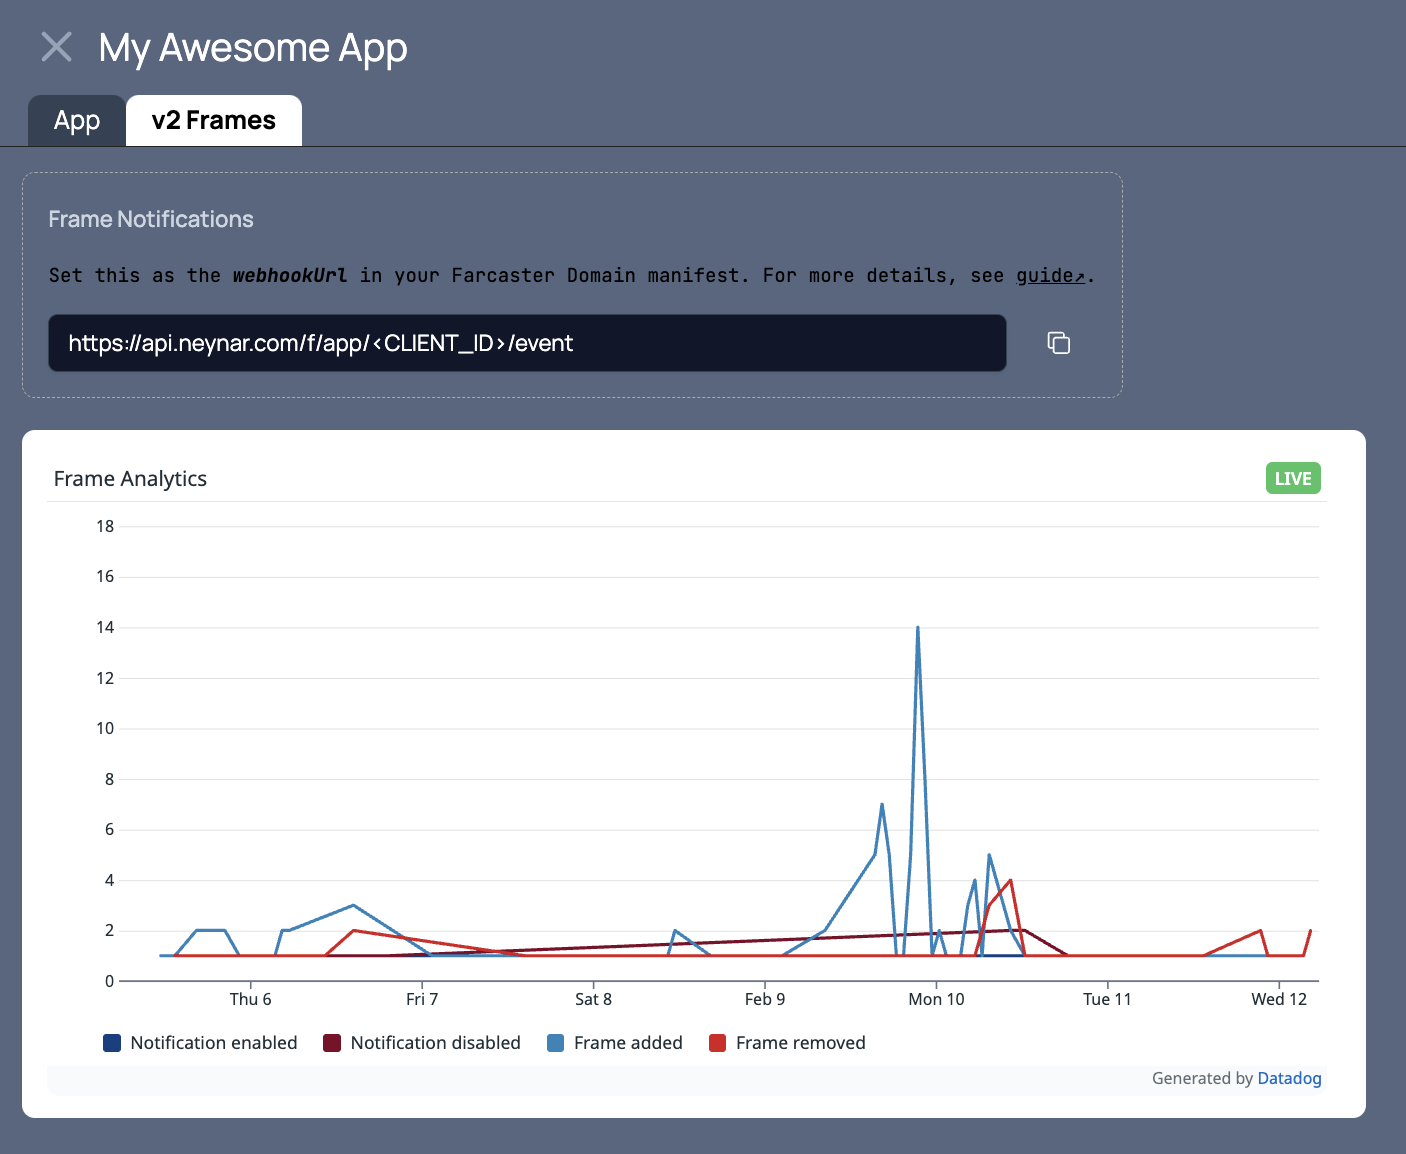
MiniAppProvider context provider, you’ll get additional analytics including notification open rates.
FAQ
How do I determine if the user has already added my mini app?
How do I determine if the user has already added my mini app?
When using the
MiniAppProvider context provider, you can check the context object from the useMiniApp() hook which contains the added boolean and notificationDetails object. More details in Frame Core TypesWhat happens if I send a notification via API to a user who has revoked notification permission?
What happens if I send a notification via API to a user who has revoked notification permission?
To avoid getting rate-limited by Farcaster clients, Neynar will filter out sending notifications to disabled tokens.
How do I fetch the notification tokens, URLs, and their status?
How do I fetch the notification tokens, URLs, and their status?
The fetch notification tokens API provides access to the underlying data.
Are there notification rate limits?
Are there notification rate limits?
Host servers may impose rate limits per
token. The standard rate limits, which are enforced by Merkle’s Farcaster client, are:- 1 notification per 30 seconds per token
- 100 notifications per day per token